There are so many options in Photoshop with all the tools and adjustments and then there are the filters. There is obviously no right way to create an image, but there are some processes that you can do that will not give you the best image possible. I’m going to start looking at some of the many many options that are available for processing your images, I’m going to call them mini tutorials, and today we start with the High Pass Filter.
Before we go on, it should be noted that this is only my opinion, feel free to disagree and not follow what I have written.
High Pass Filter
Today I thought we would look at the High Pass filter in Adobe Photoshop and how it can be over used, but also how you can use it effectively in your images.
This filter is used by many people as a way of getting greater detail for their images. However, it can often be overused and makes the image look hard, or grungy. I don’t really know how to describe it. It may sharpen the image, but can do it too much. However, there is a place for it, and instead of it being used for the whole, it can be very effective to use it for some of the image. So follow me with this tutorial and see what you think.
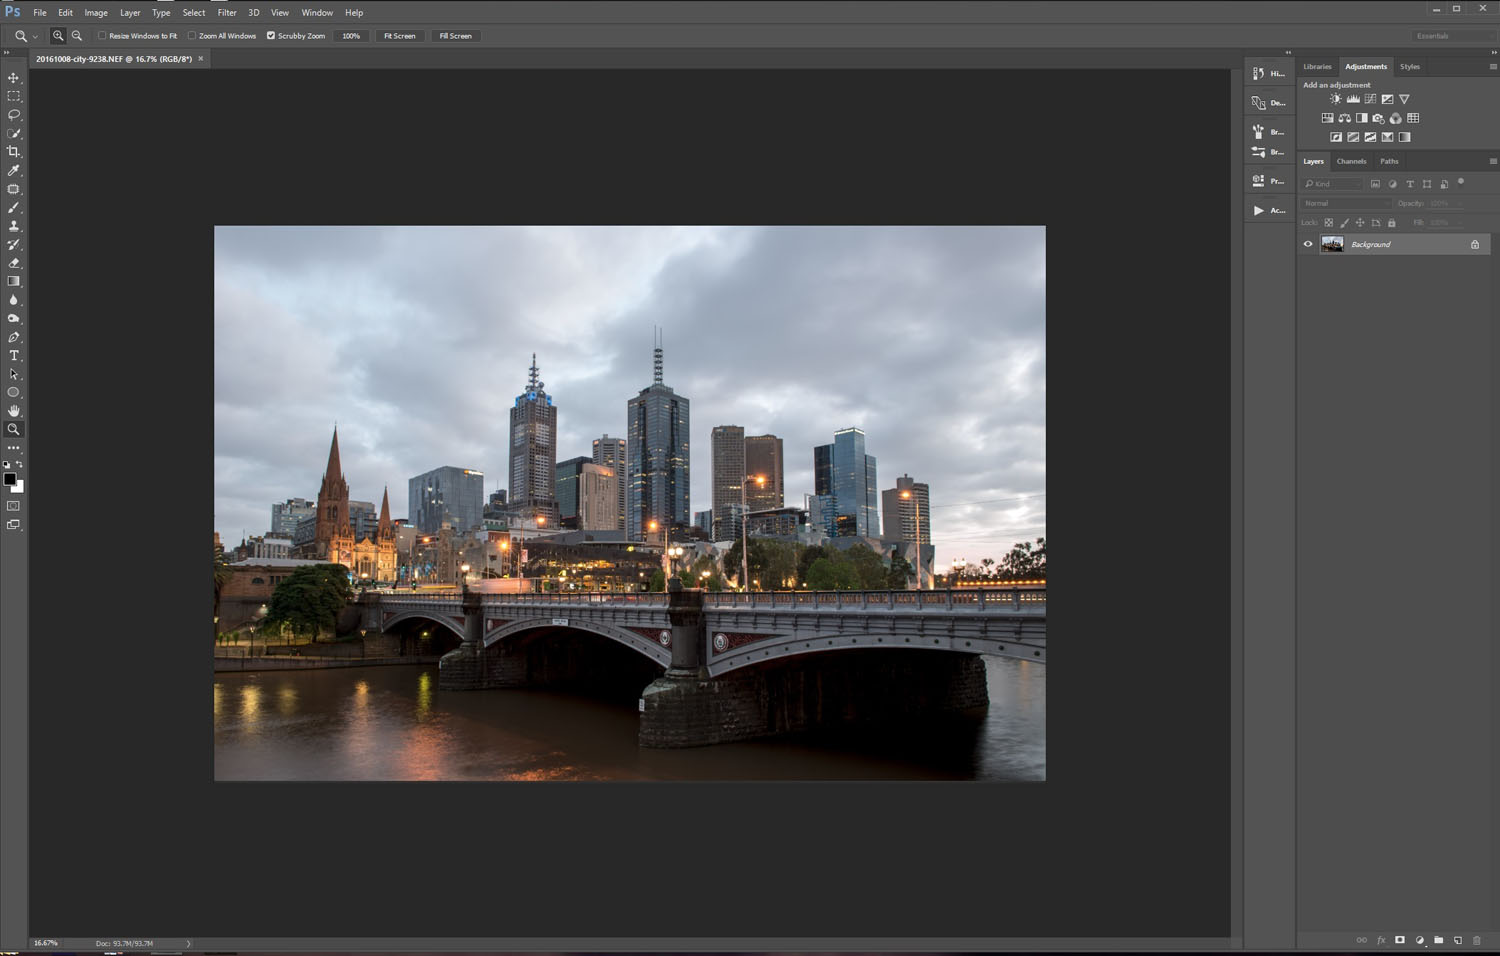
This is going to be like a tutorial. So open your image and get it ready in Photoshop. This image was chosen because it has lot of building, so lots of lines in it, which make it a good image for the High Pass Filter.
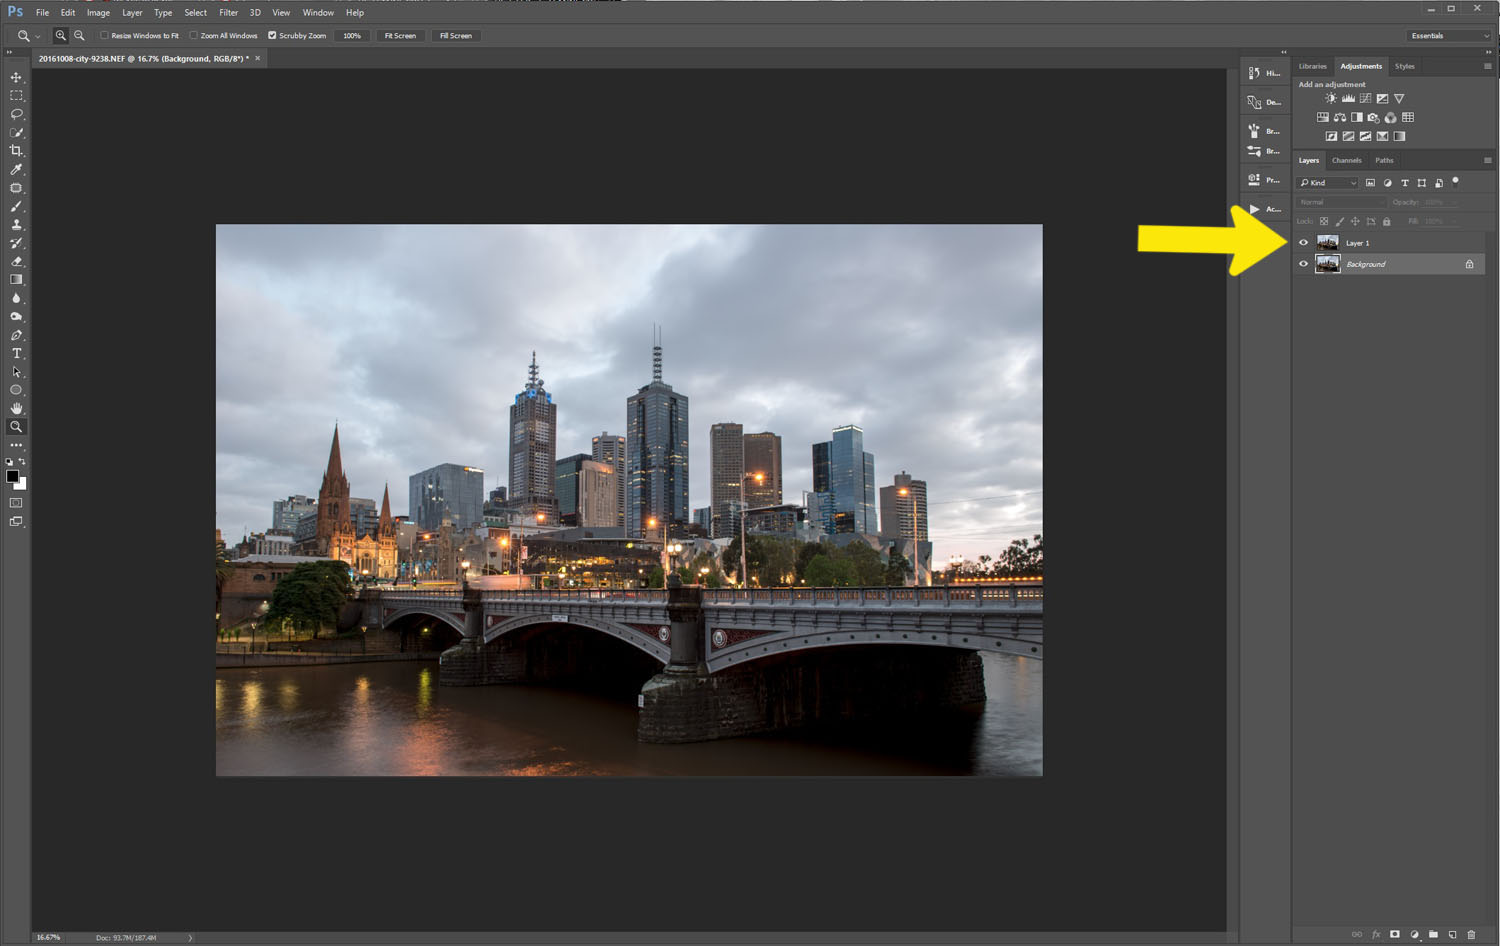
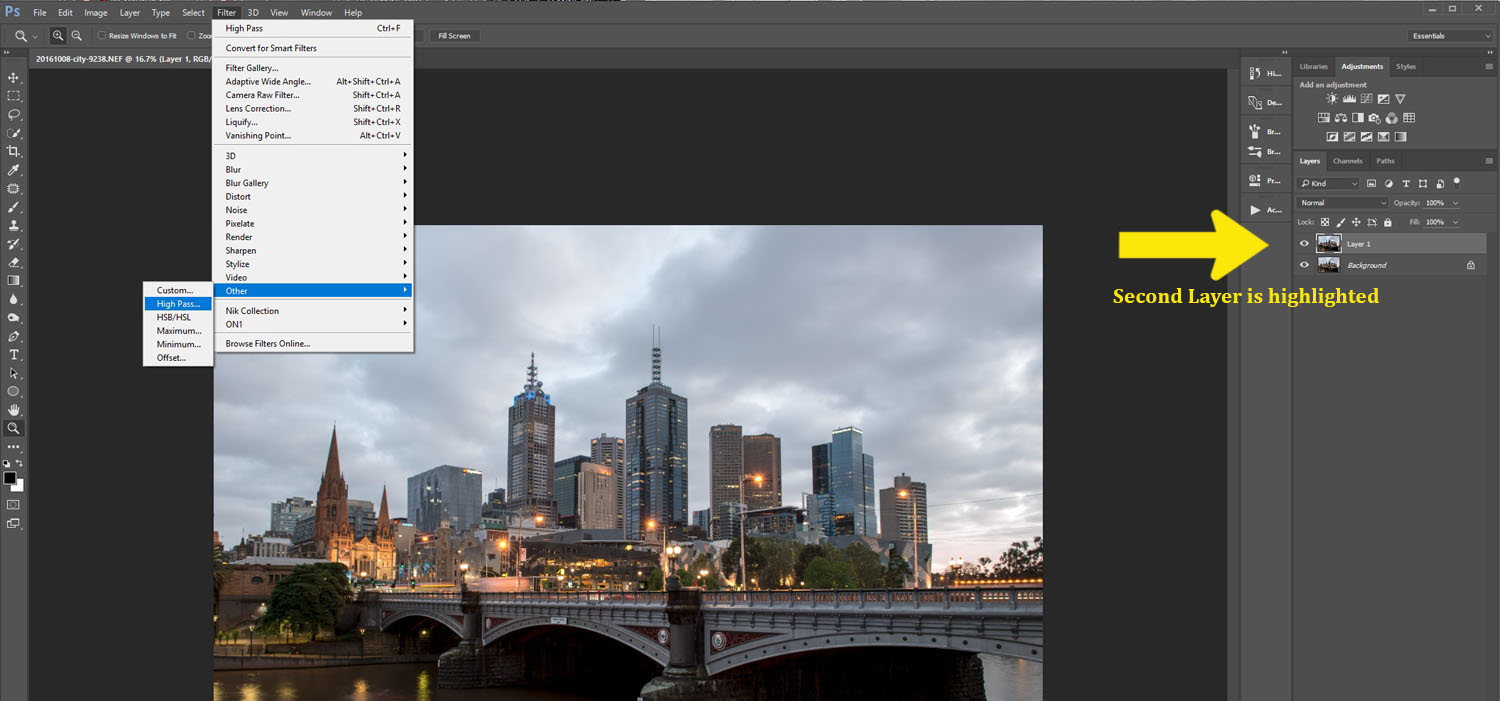
For High Pass to work effectively you need to copy the original layer. The quickest way to do this is to press Ctrl J. Make sure the original image is highlighted in the layers panel on the right of your screen. You can also go up the Main menu at the top, click on Layer, select Duplicate Layer.
You are ready for the High Pass filter. Make sure the second image is highlighted, or the copy of the original. Go up to the main menu along the top of your screen and select Filters, go down to Other, click on High Pass.
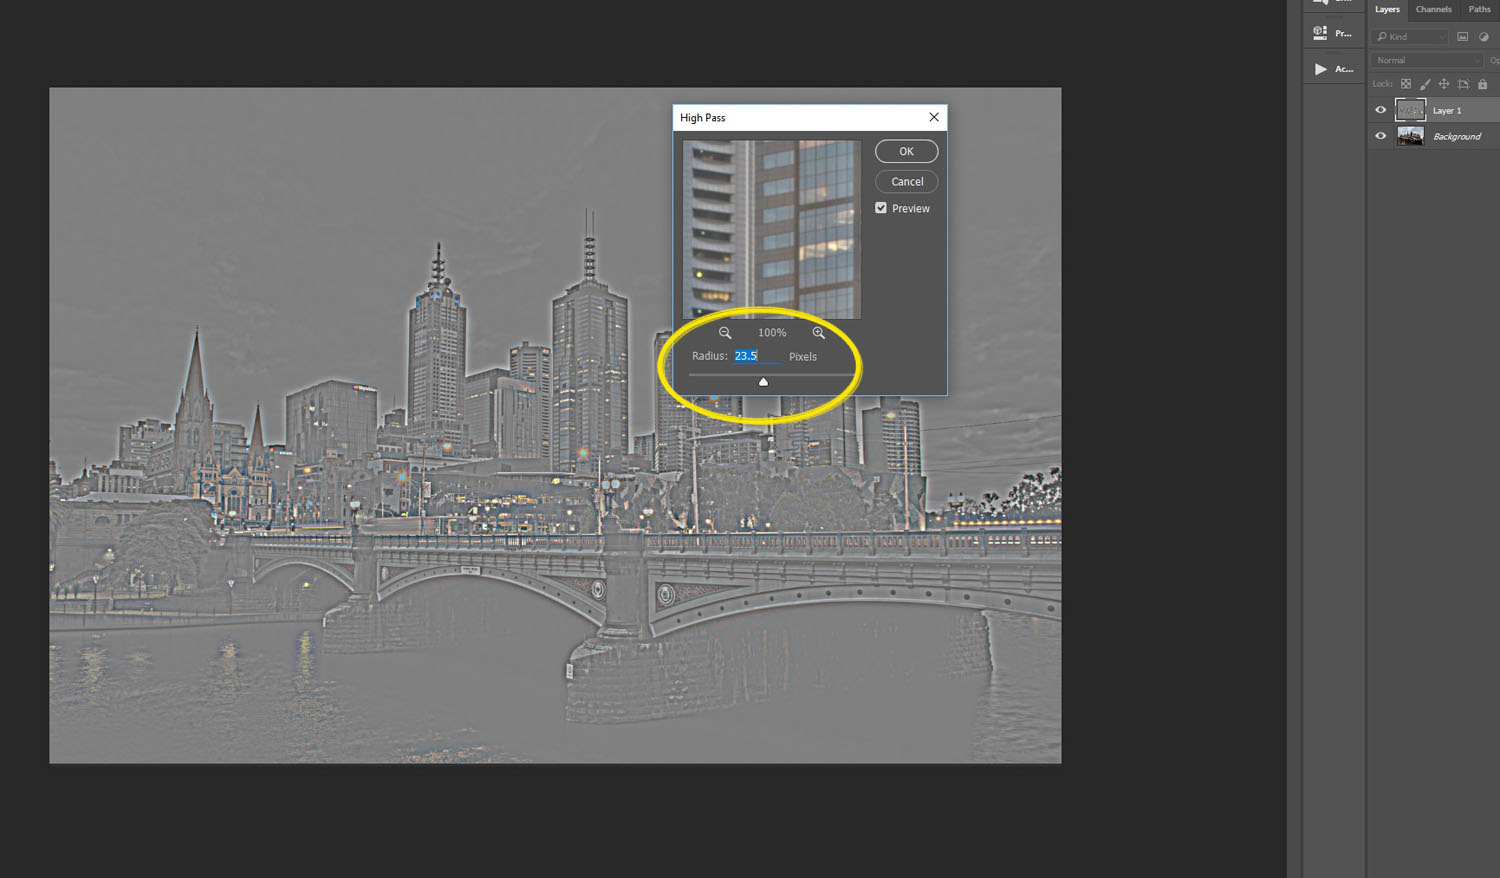
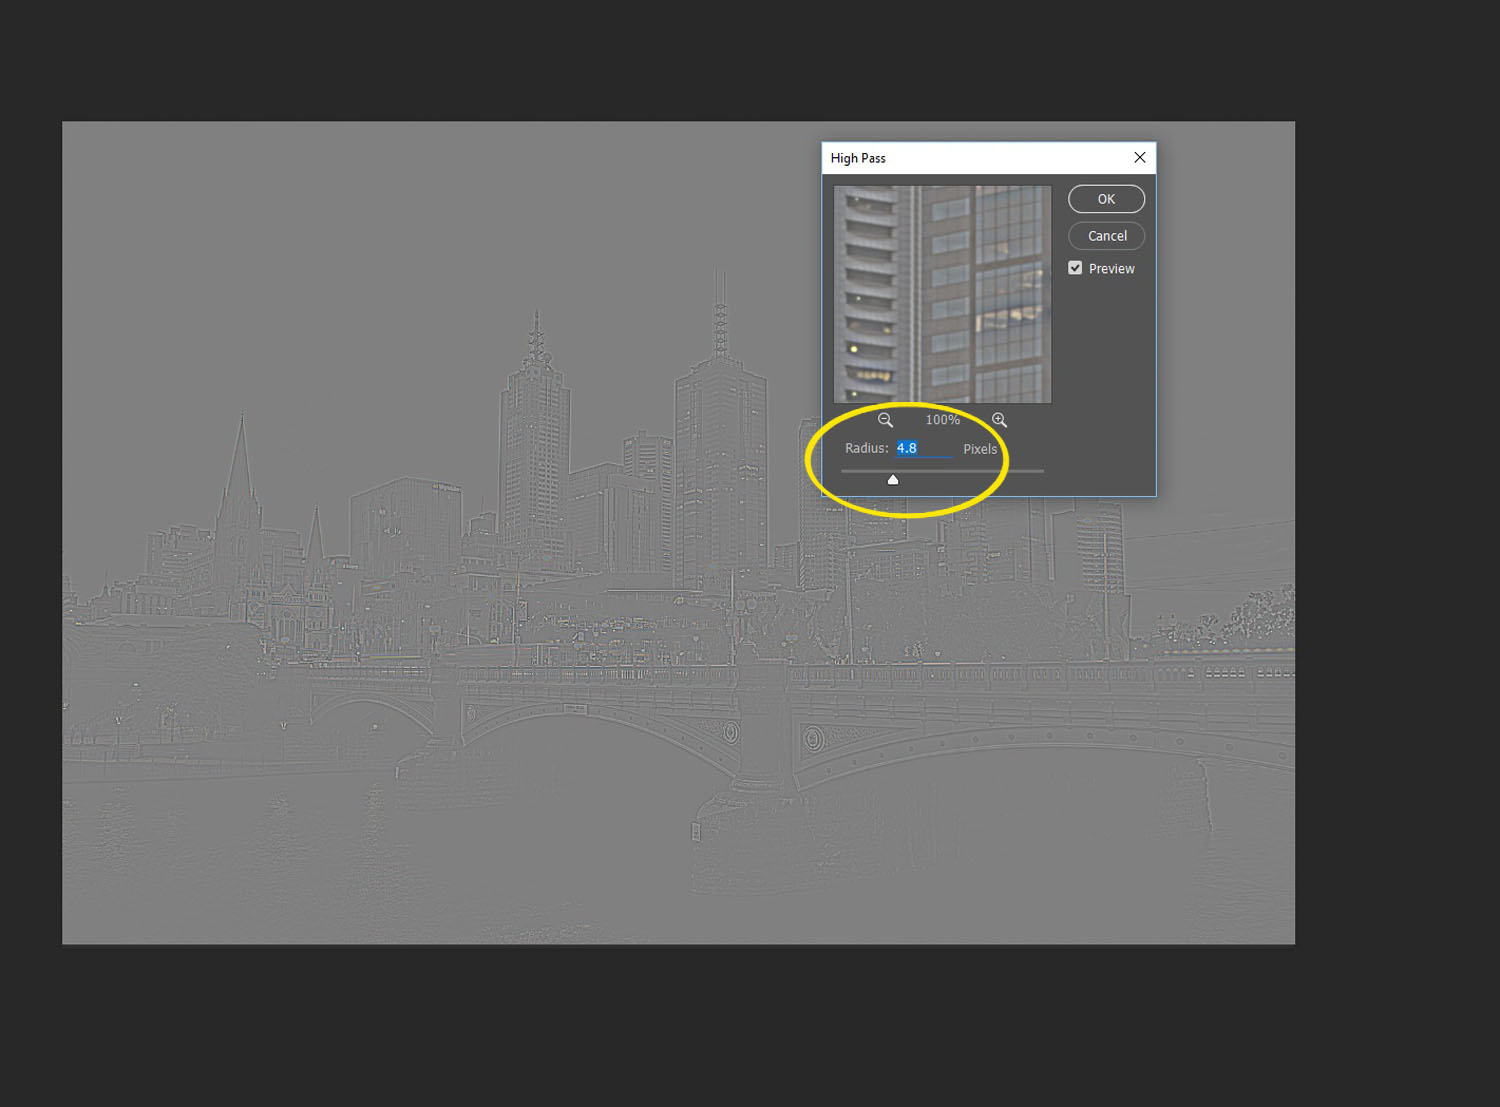
Once selected you will notice that you image will go all grey and a window will pop up.
You can usually see the image through it. If you click on the arrow on the slider and move it from side to side you will see that it changes how strong the effect of it.
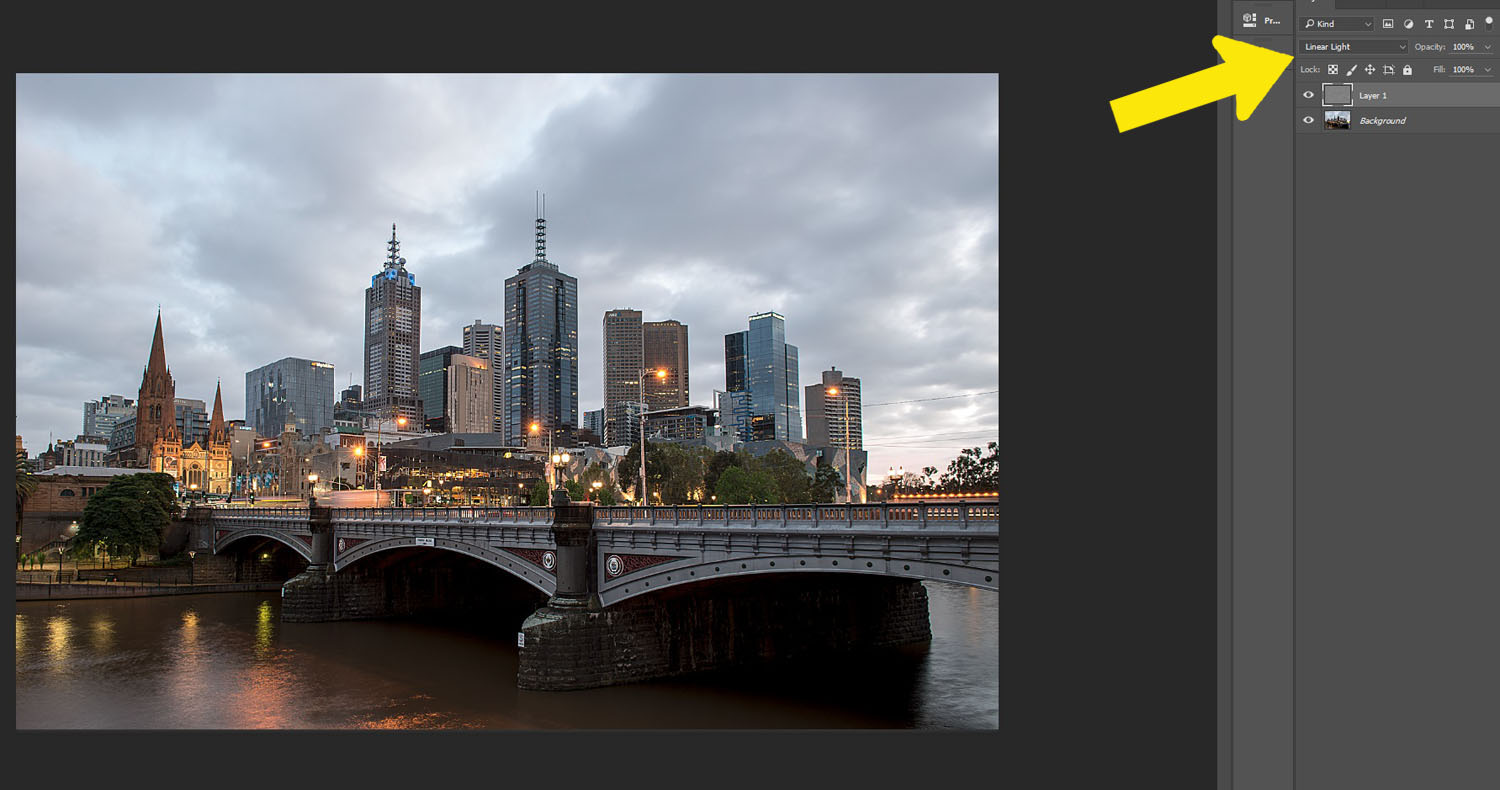
For this part of the tutorial, it is going to be done strong, so you can see how bad it can look. The slider was moved to about 30, click OK.
You just have a greyed out image now. To get your image back you blend the layers together.
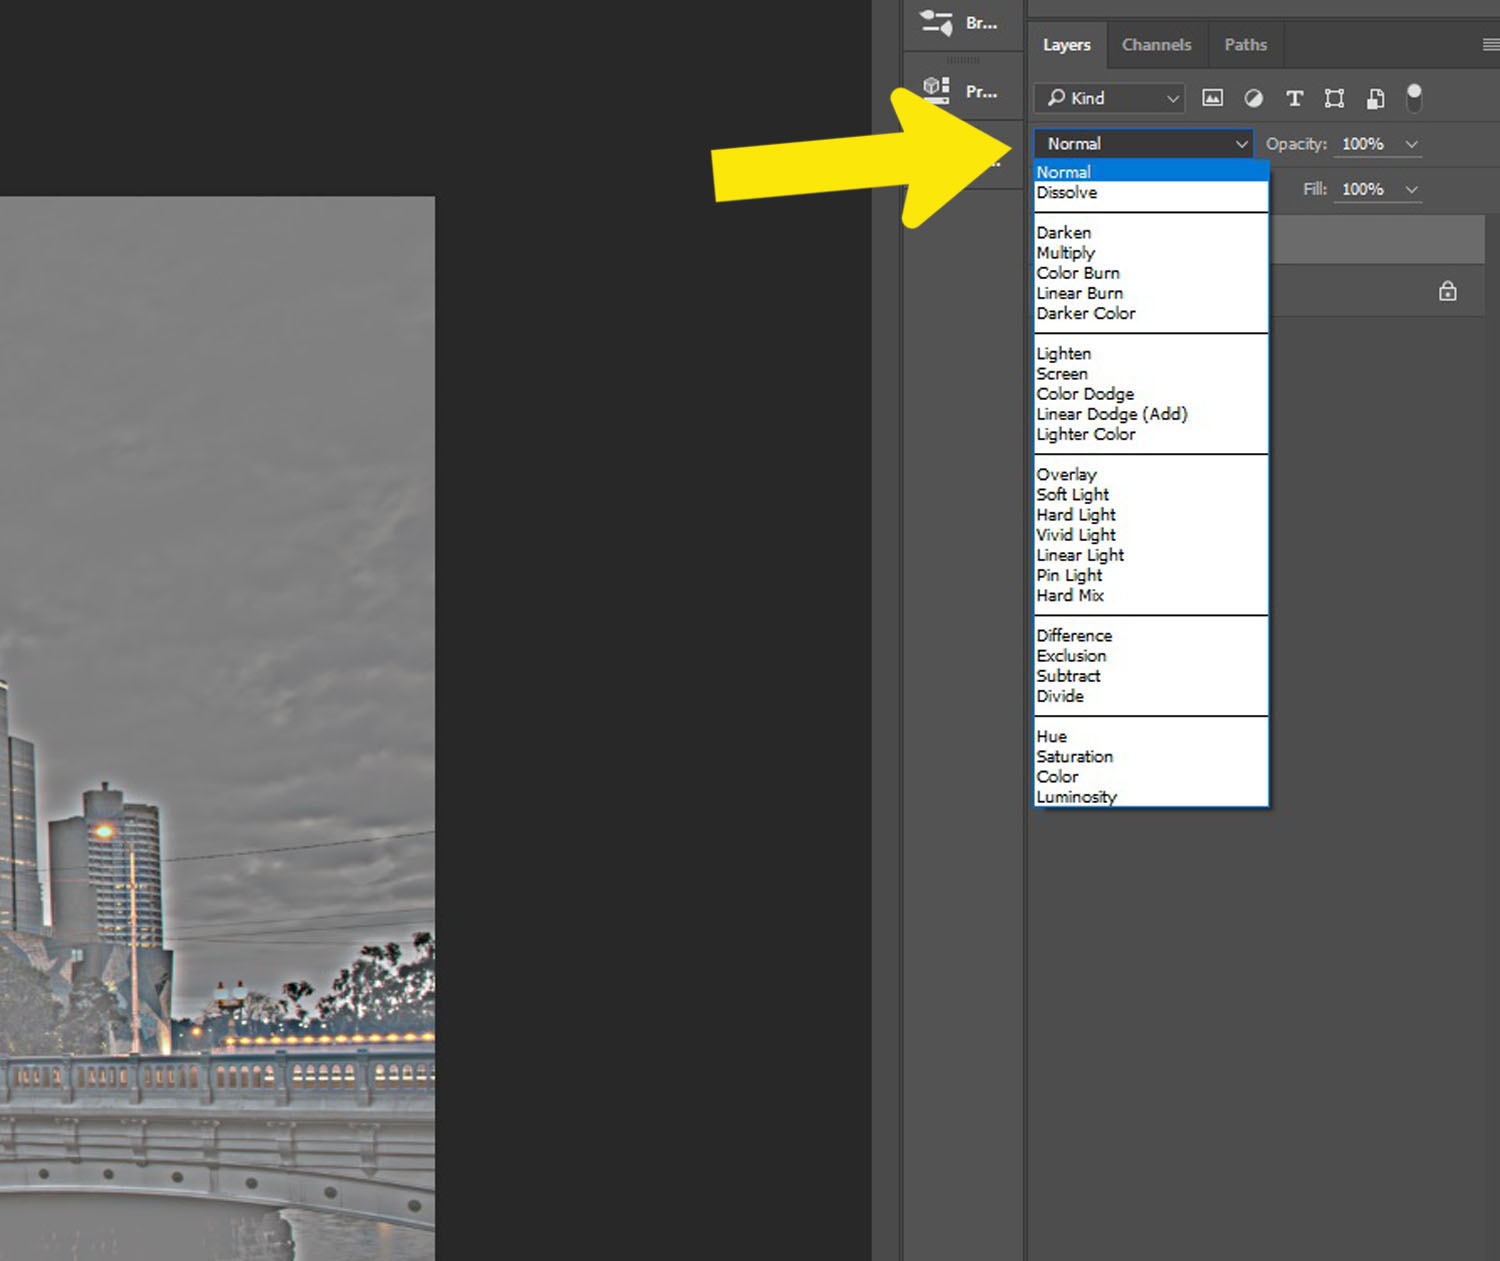
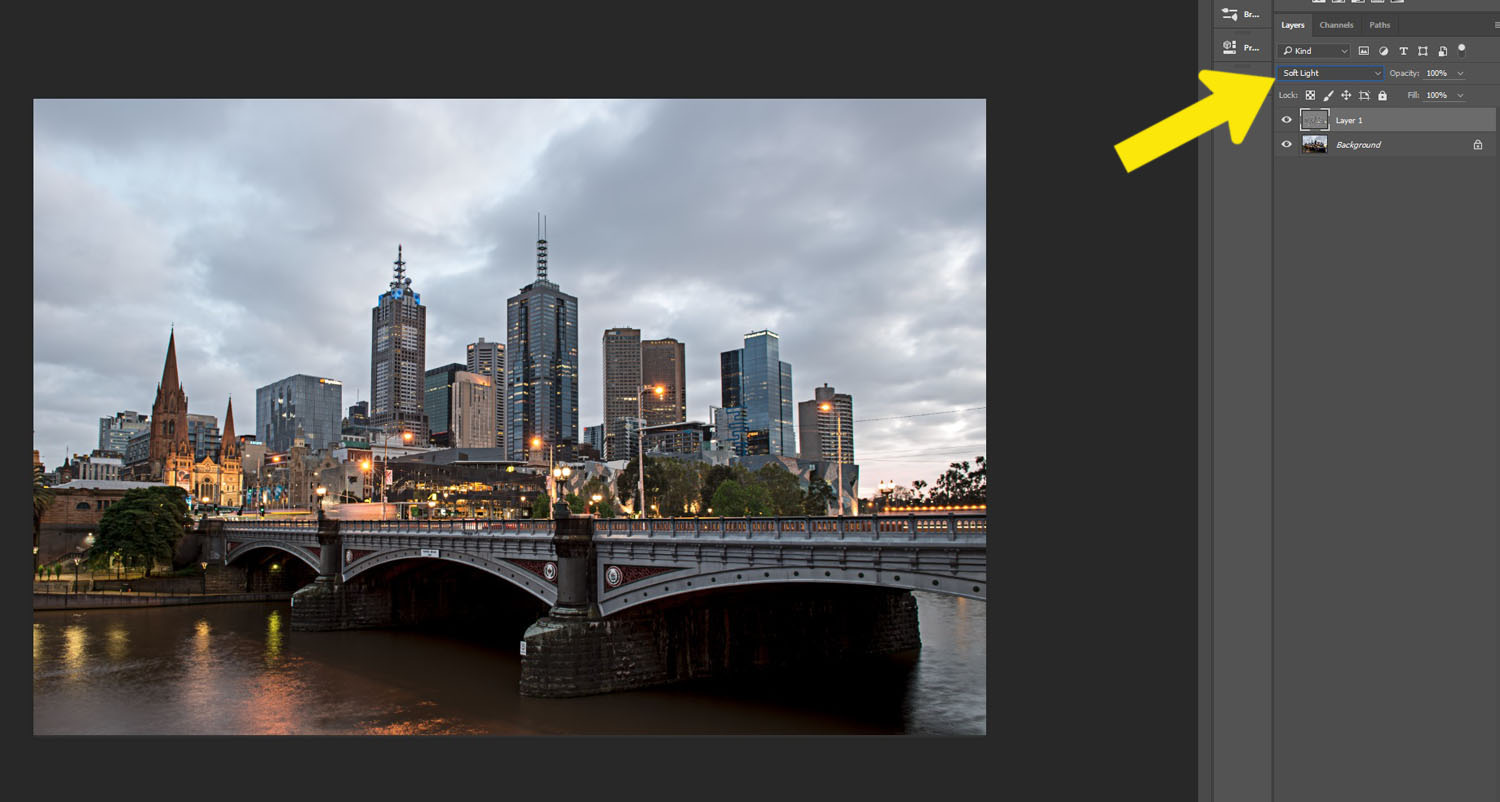
Above the layers panel on the right of the screen there is an option there to for blending. The first one is Normal, click on it.
You can click on any of them that you like, see what the results are. Just keep trying.
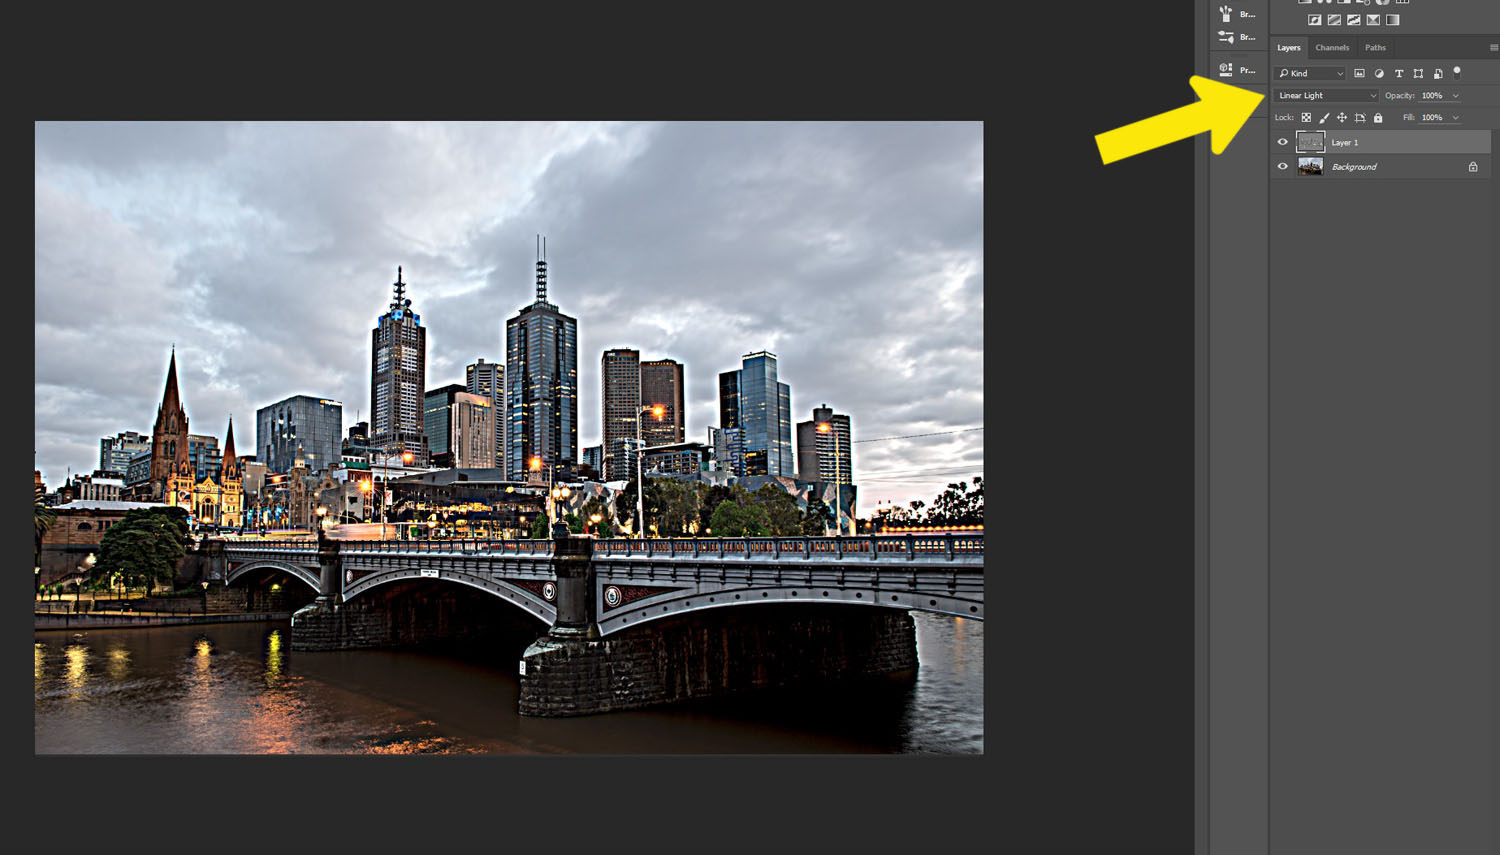
However, the one that most people tend to use is Linear Light. That was how I was taught to use it.
You may think this is a good image and like the effect, but for me it is too strong, too unrealistic. It gives the image a grungy look.
You can try using other blending options, perhaps soft light. However, when you do that you lose the effect almost completely.
The original selection for High Pass was too strong, so now delete that second layer. You can click on it and drag it down to the rubbish bin in the bottom right corner. If you are game, make sure the layer you want to delete is highlighted and, just press the delete key on your keyboard.
Do the start of the tutorial again until you get to the part where you decide how strong it will be.
Once you have the pop up window for the High Pass Filter up click on the slider and move the marker all the way to the left so the Radius is as low as it will go, 0.1
Once you have it there you can start moving to the right, but slowly. Do this until the image starts to become visible in the grey, but only just. For this image it was 4.8
Now you can use the blending options again, select Linear Light.
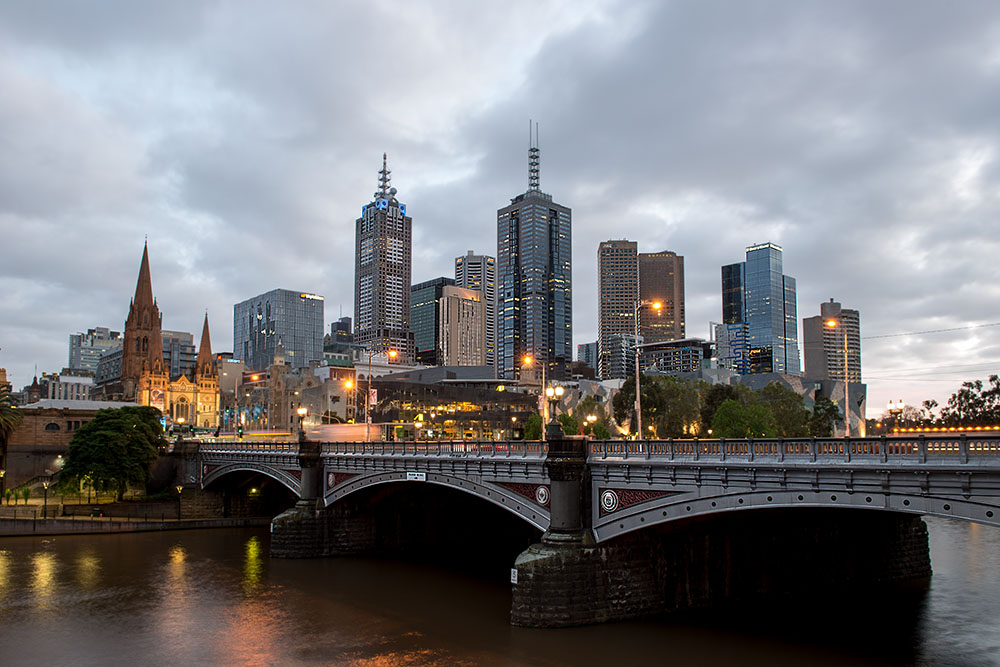
It is probably still too strong for this image, but you can see that it has an effect, but not made the whole image have that grungy look.
Really, you don’t want to have this effect on the whole image. You still want the soft clouds, and the water to be as it was in the original image. It could also be a good way to draw attention to part of the image.
Going to change the effect of the filter so that you can only see it on part of the image.
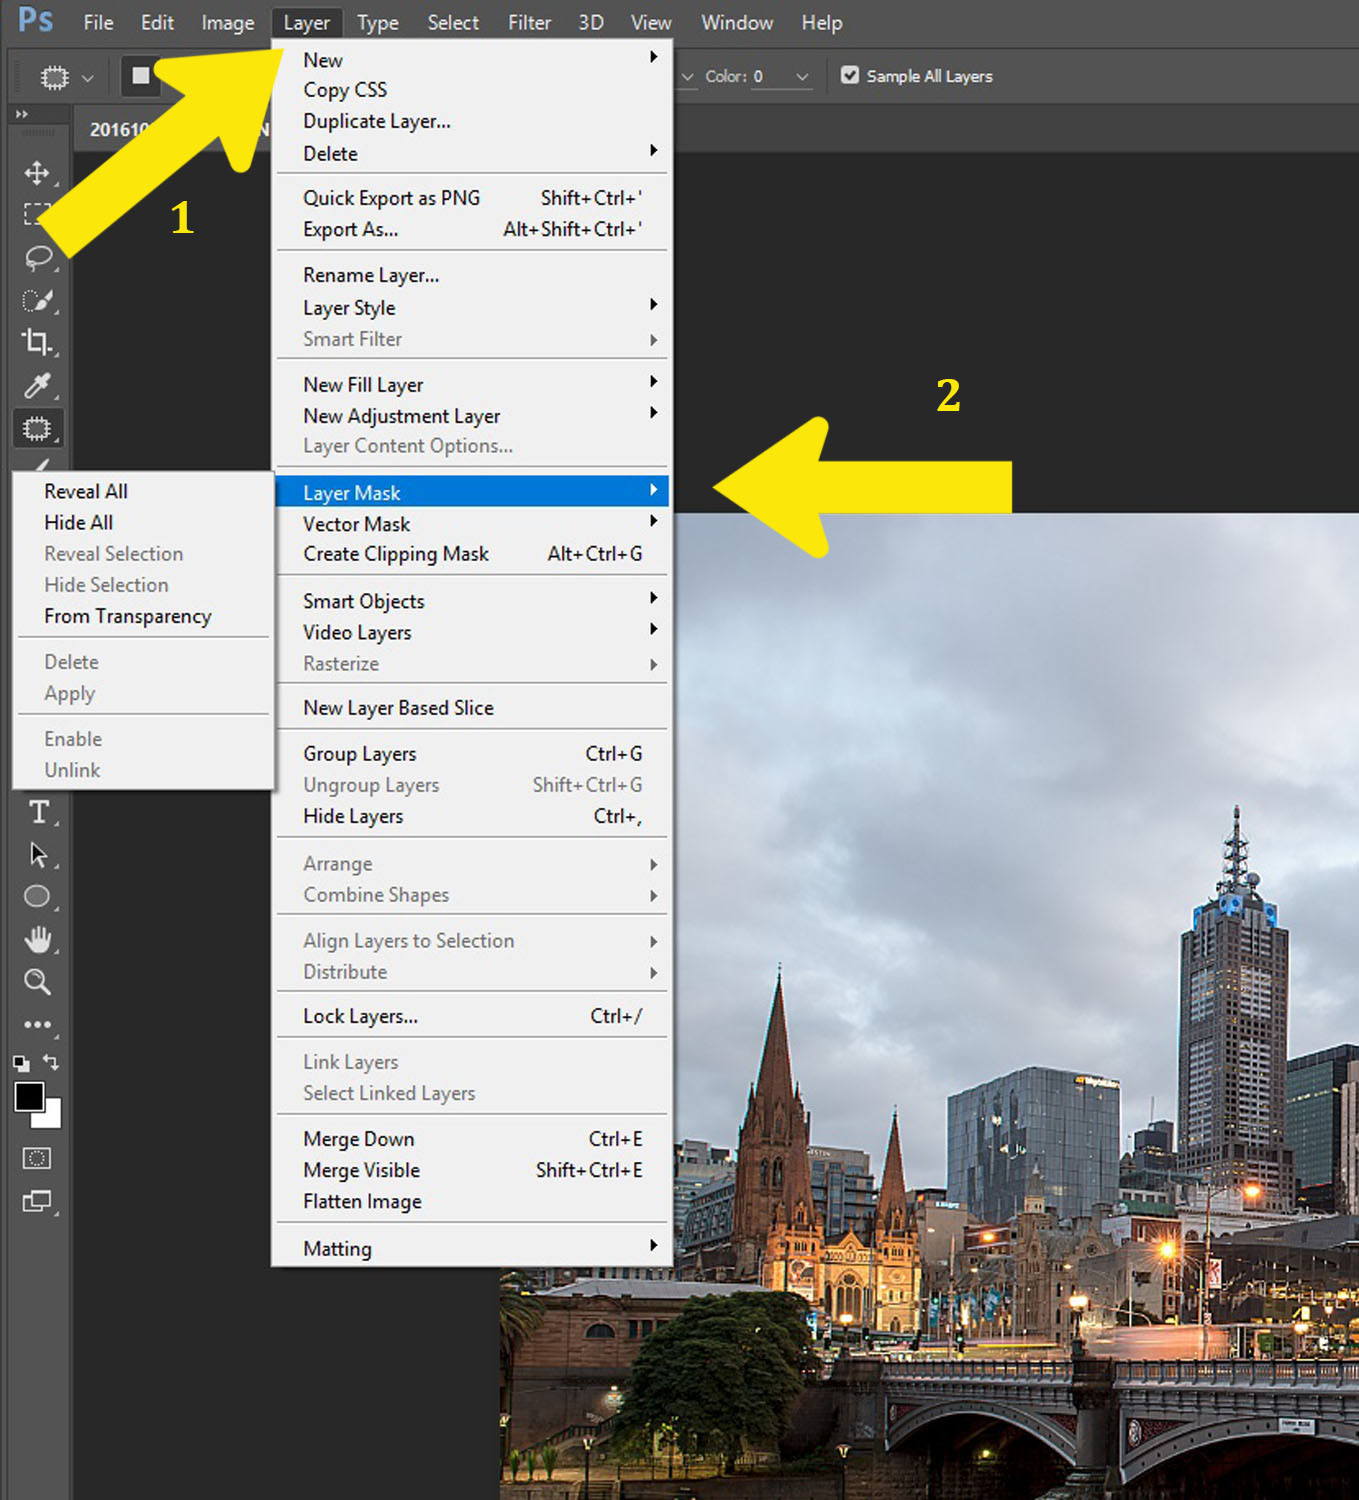
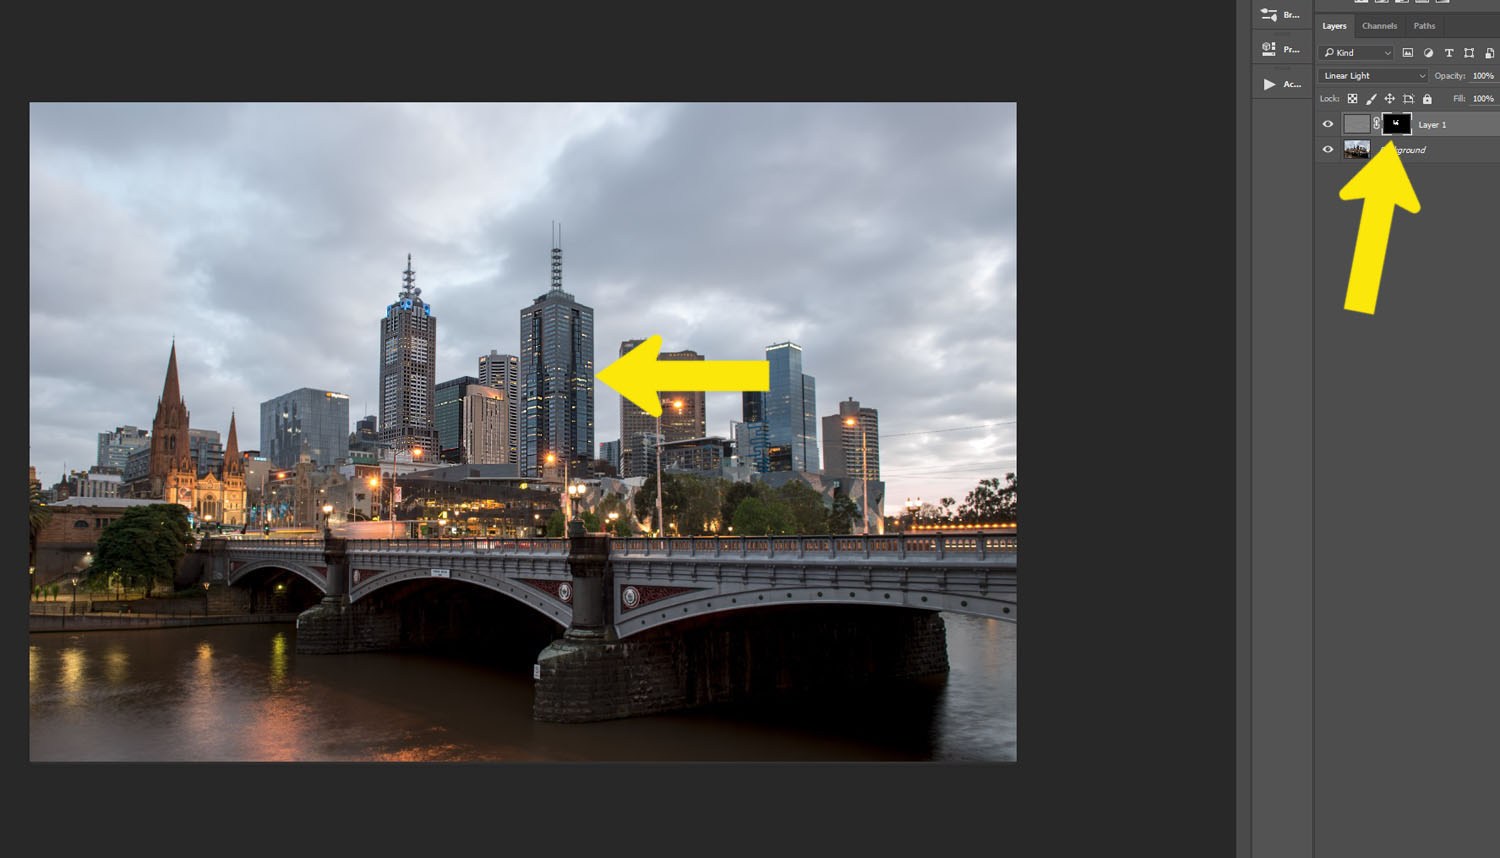
Add a mask to the layer that has the HIgh Pass Filter. To add a mask you can click the icon at the bottom of the layers panel, it is the white rectangle with the black circle in it. Or alternatively you can go up to the Menu, at the top, and select Layer, Layer Mask, and for this tutorial select Hide all.
If you choose to click on the Layer Mask Icon, then to hide all press Ctrl i, you will see the mask has gone completely black.
You should notice that you can no longer see the High Pass Layer. It has been hidden with the Layer Mask.
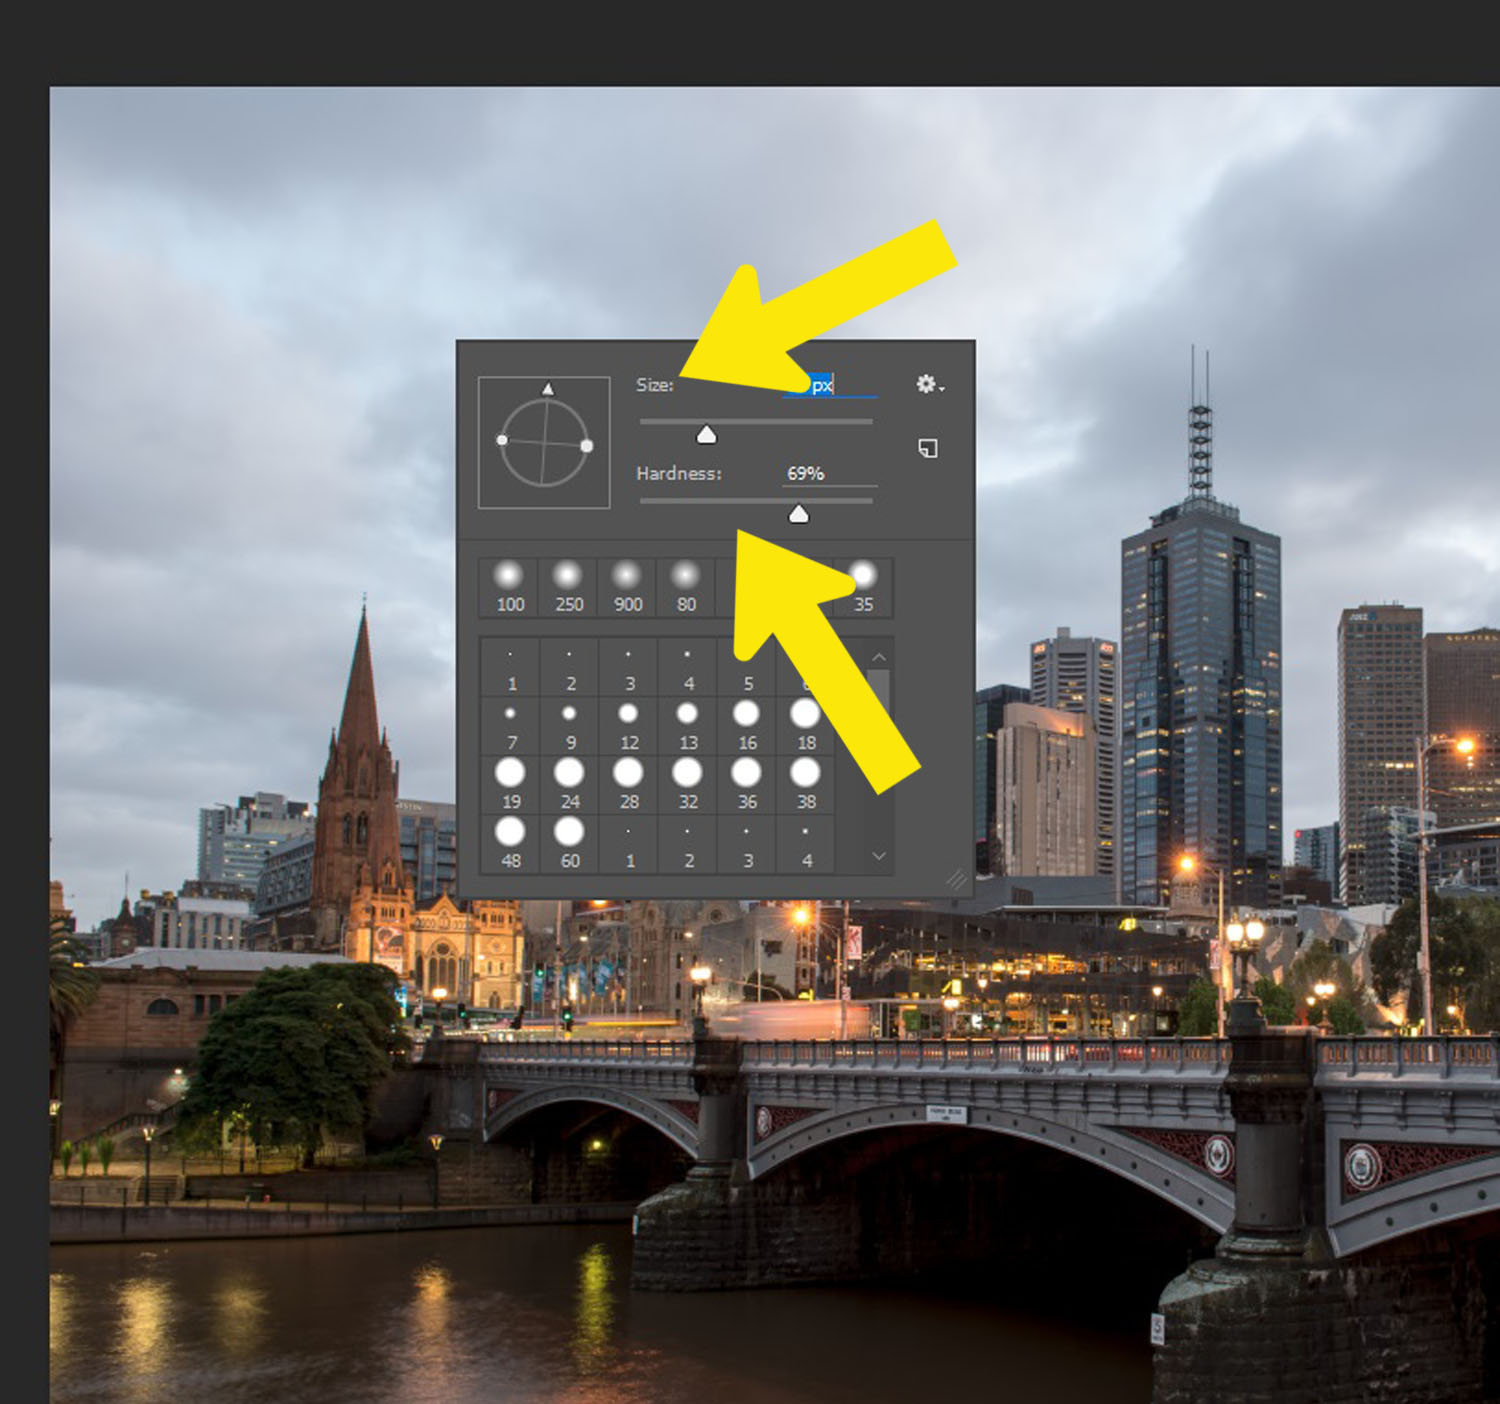
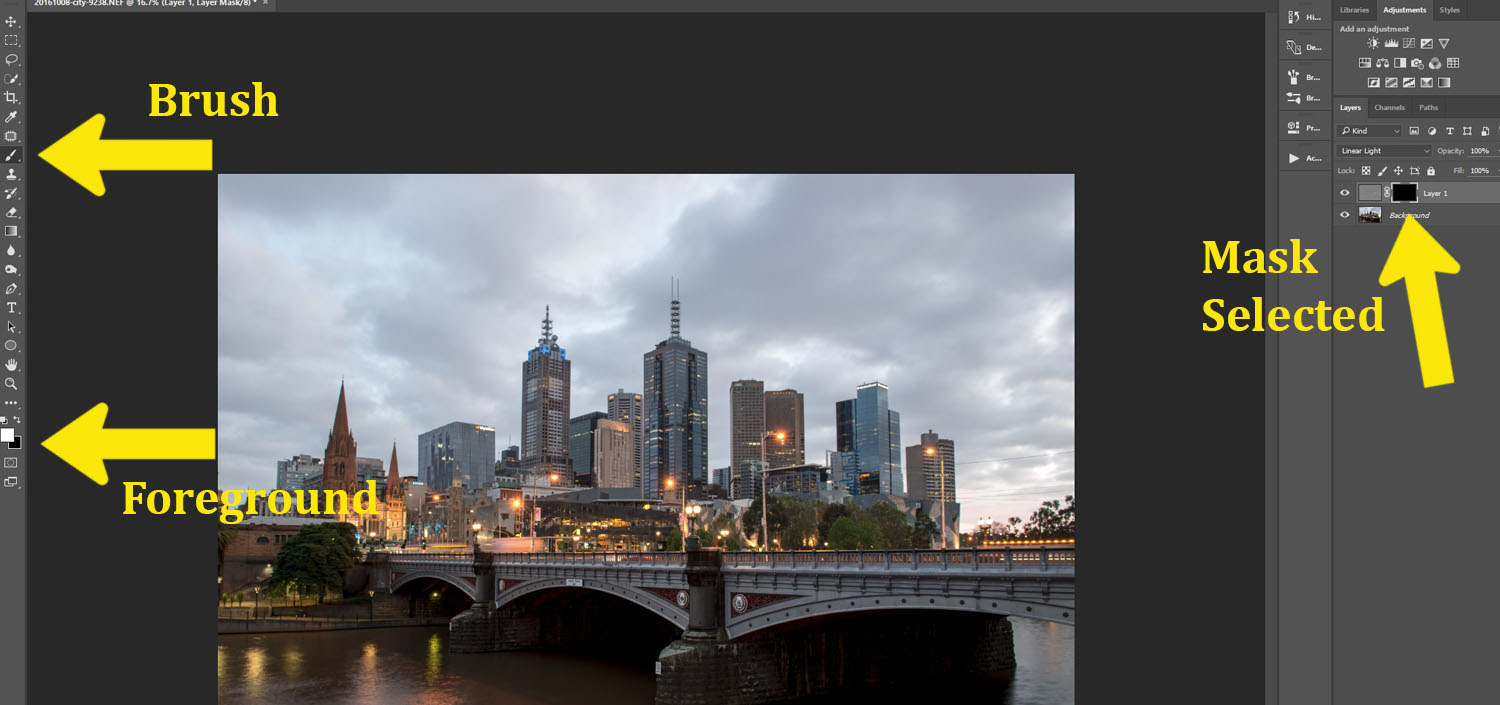
Select your Brush Tool from the Tool Bar Panel on the left side of the Window, or press b on your keyboard. To change the size of your brush and the softness right click on the image with a PC and on a Mac press Ctrl and click the mouse. A window will pop up with some brush options.
What size or how soft the brush is will be determined by your image. For this a small brush was selected and the brush was hard, over about three quarters. Don’t want a really hard brush, but also not a soft one.
To make the brush smaller or larger you can also use the square bracket keys on your keyboard.
Before you start revealing the High Pass Layer with the layer mask check to make sure the foreground colour selected is white. Also need to make sure the mask is selected. When it is selected you will see white lines around the outside of it.
Now you can just start painting on the image. The white will reveal what is underneath the mask.
If you make a mistake and need to reverse what you have done, change the foreground colour back to black and paint where the mistake was made. The keyboard shortcut for this is the x key.
If you start painting the mask and nothing is happening then you most likely have the wrong foreground colour chosen.
If the brush is a cross then you might have the caps lock on. Alternatively, you might have the brush so big you can’t really see it.
That is really all you need to know about the High Pass Filter. Remember to use it to enhance your images, add a bit of detail here and there, but not to overtake it. Restraint is needed with this filter.
I hope you have enjoyed this mini tutorial. If you are interested in learning more about Photoshop I often online editing classes, email me if you are interested.
Hey Leanne … Thanks for the super tutorial! I put PS on the back burner but have just recently decided to get cracking with it 😃
That sounds like a great plan Julie, I love working on it. thanks Julie. 😀
Really nice. I am going to try it out .
Thank you, I hope it works for you.
Had never used this filter so a very useful tutorial, thanks Leanne.
That’s great Chris, glad I could introduce you to a new one, thank you.
Hi Leanne, thank you for sharing this mini tutorial, I find it very useful. I use Photoshop to edit my images but never used this filter and didn’t even know what it did exactly.
I am so glad I helped out, it is nice filter, but one you need to be careful using, but try it out and see how you go. Thanks.
I don’t use Photoshop, but the Highpass is available in Elements with less options.
That’s good, it is a shame that you don’t have as many options, but hopefully you can work out how to make it work for you. Thank you Bob.
TopazLabs Clarity really works amazingly. So many options on high, medium, low, and micro contrast.
I don’t have any of the plugins, so have to settle for what Photoshop has.
Following your art for some time now, you don’t need help in your creations
Thank you Bob, that is a lovely thing to say.
Thank you, Leanne. This was a very useful tutorial and the use of the High Pass Filter definitely makes a beneficial difference to an image if used judiciously, as you mentioned. It is great to have another tool in one’s post-processing workflow!
You’re welcome Denise, that is great to hear. It can really make a difference, but as you said if used judiciouly. Thank you.
I enjoyed your discussion regarding the High Pass filter. Gosh, it is such a misunderstood photoshop filter.
I use High Pass as my only sharpening. Even on my 16X20 prints.
My process is not as complex as your tutorial, but that said, your step by step treatment of it is perfect. Thanks.
That’s great Enman, and yes, I think it is too.
I tend to use it to give things more clarity, but I don’t use it much.
Glad you think that, thank you.
great tutorial on this “strange” filter…I have been using the HighPass filter for a number of years…my method (which works for the way I shoot) is to make a B&W copy of the base image with SilverEffects – then apply the filter and blend with soft light…by using SilverEffects, I can choose how harsh (or smooth) I want the details to be.
That’s an interesting process Robert, it is amazing seeing what others with their processing.
You are right, it is a strange filter. Thanks for sharing that.