Last week I promised you a tutorial on how sending trees skyward, and I am keeping that promise. I have prepared this for you to do it yourself.
Tutorial – Sending trees skyward
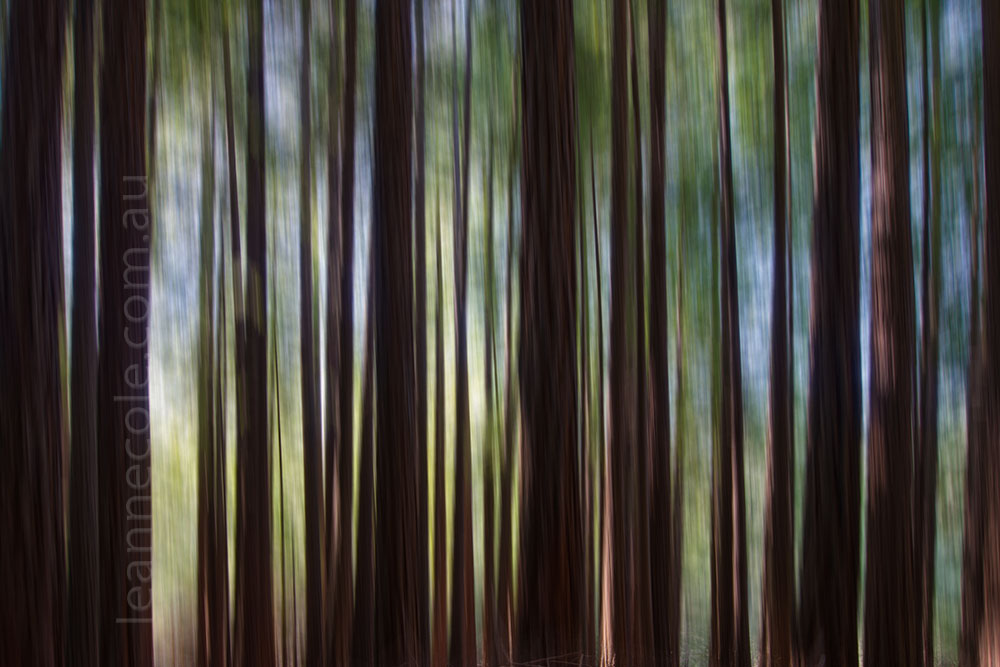
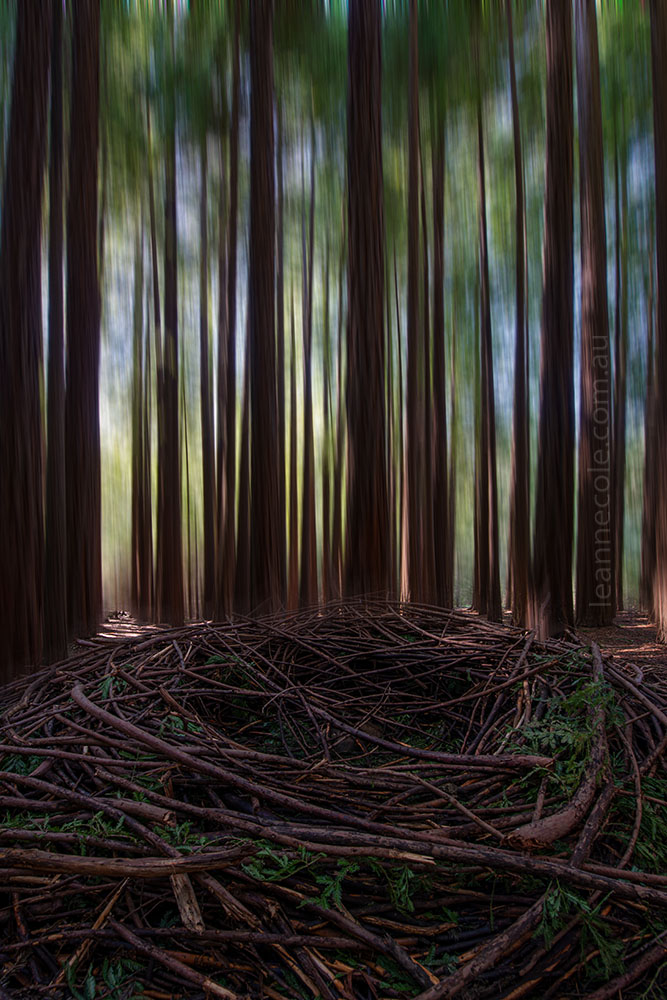
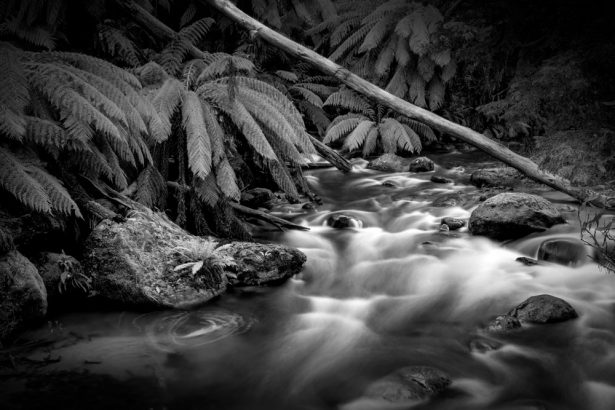
Last week I showed you that image of the nest in the redwood forest near Warburton, Laying Eggs in a Nest. I asked if you wanted a tutorial on how to make the trees look like they were going up. So many of you said yes.
I’m not going to do the eggs, because they took me a long time to do and the tutorial would take me forever. Perhaps I can do some similar things another time. I have also done a video of this and you will find it at the end of the post.
I am using a PC so Windows is running Adobe Photoshop. If you use a Mac then remember that Control is still Control, I think and Alt is Option on a Mac.
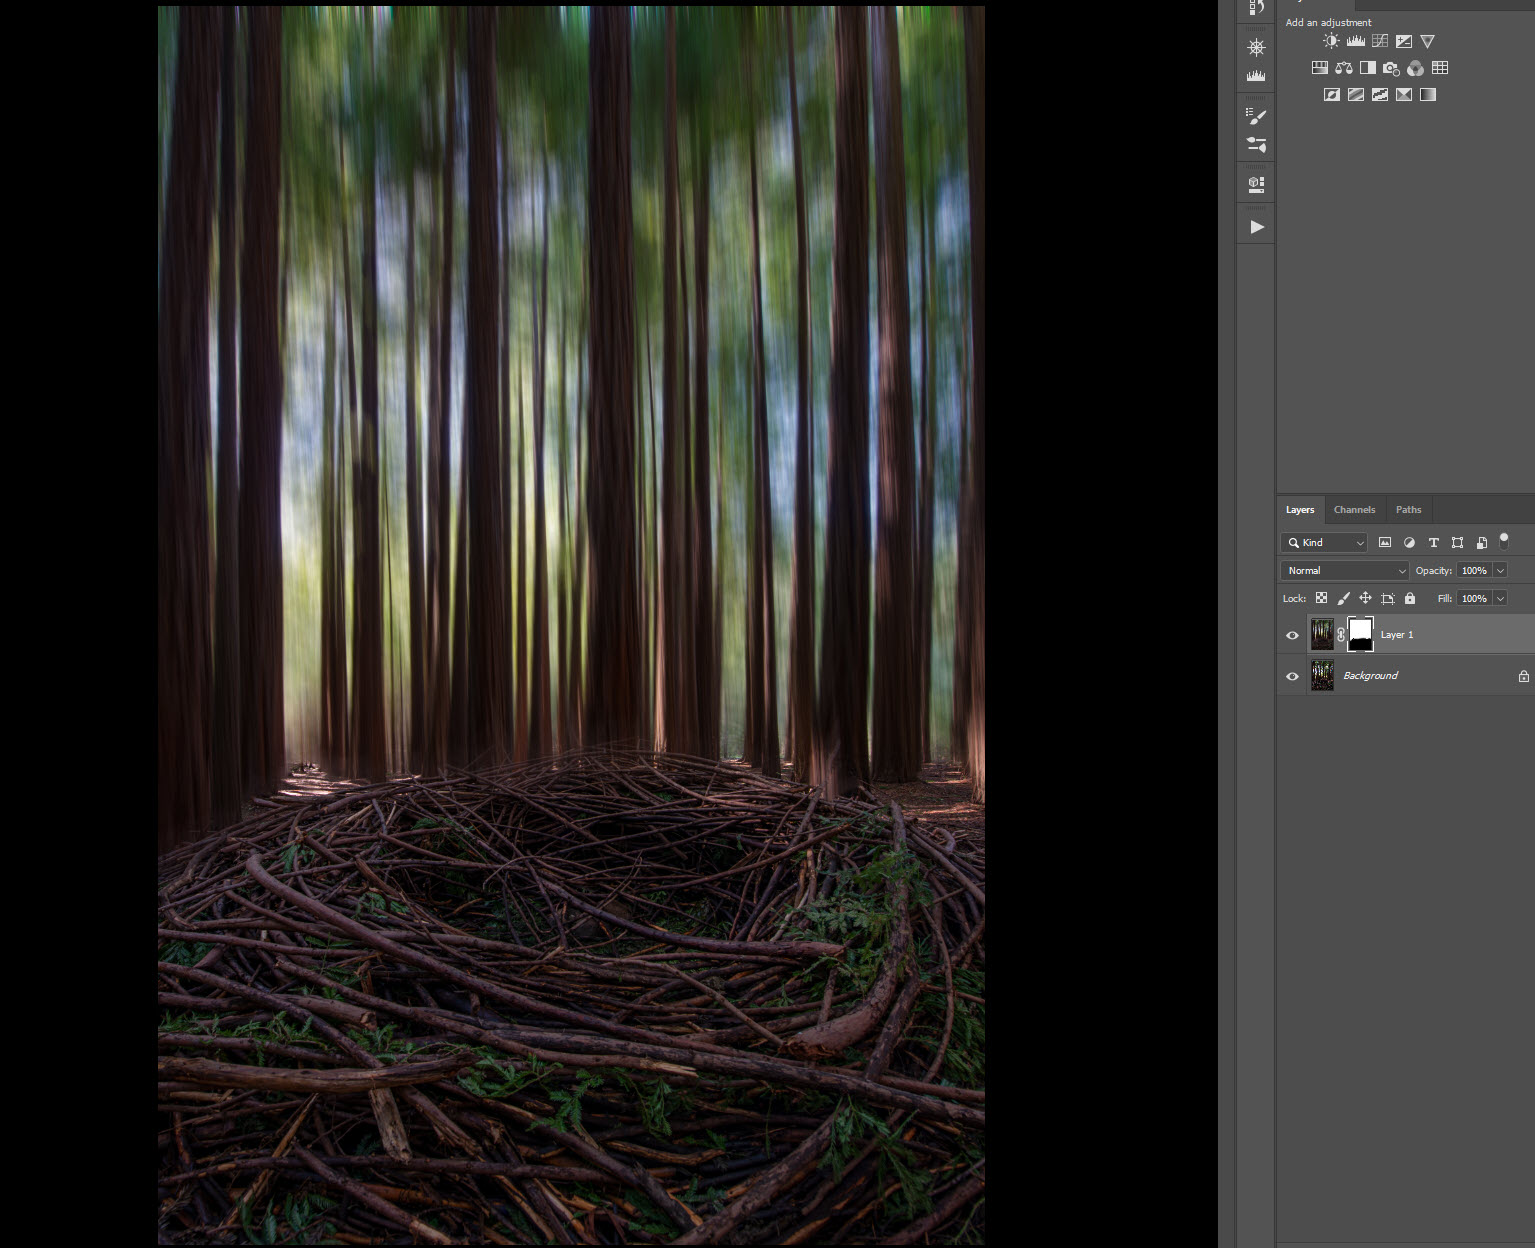
To start the image I have done a few things in Adobe Camera Raw and then opened it in Photoshop. The image is ready to start. However, I want to point out that this image was taken with a wide-angle lens, so the trees weren’t straight. They can be straightened in ACR with the transform tool, which is across the top.
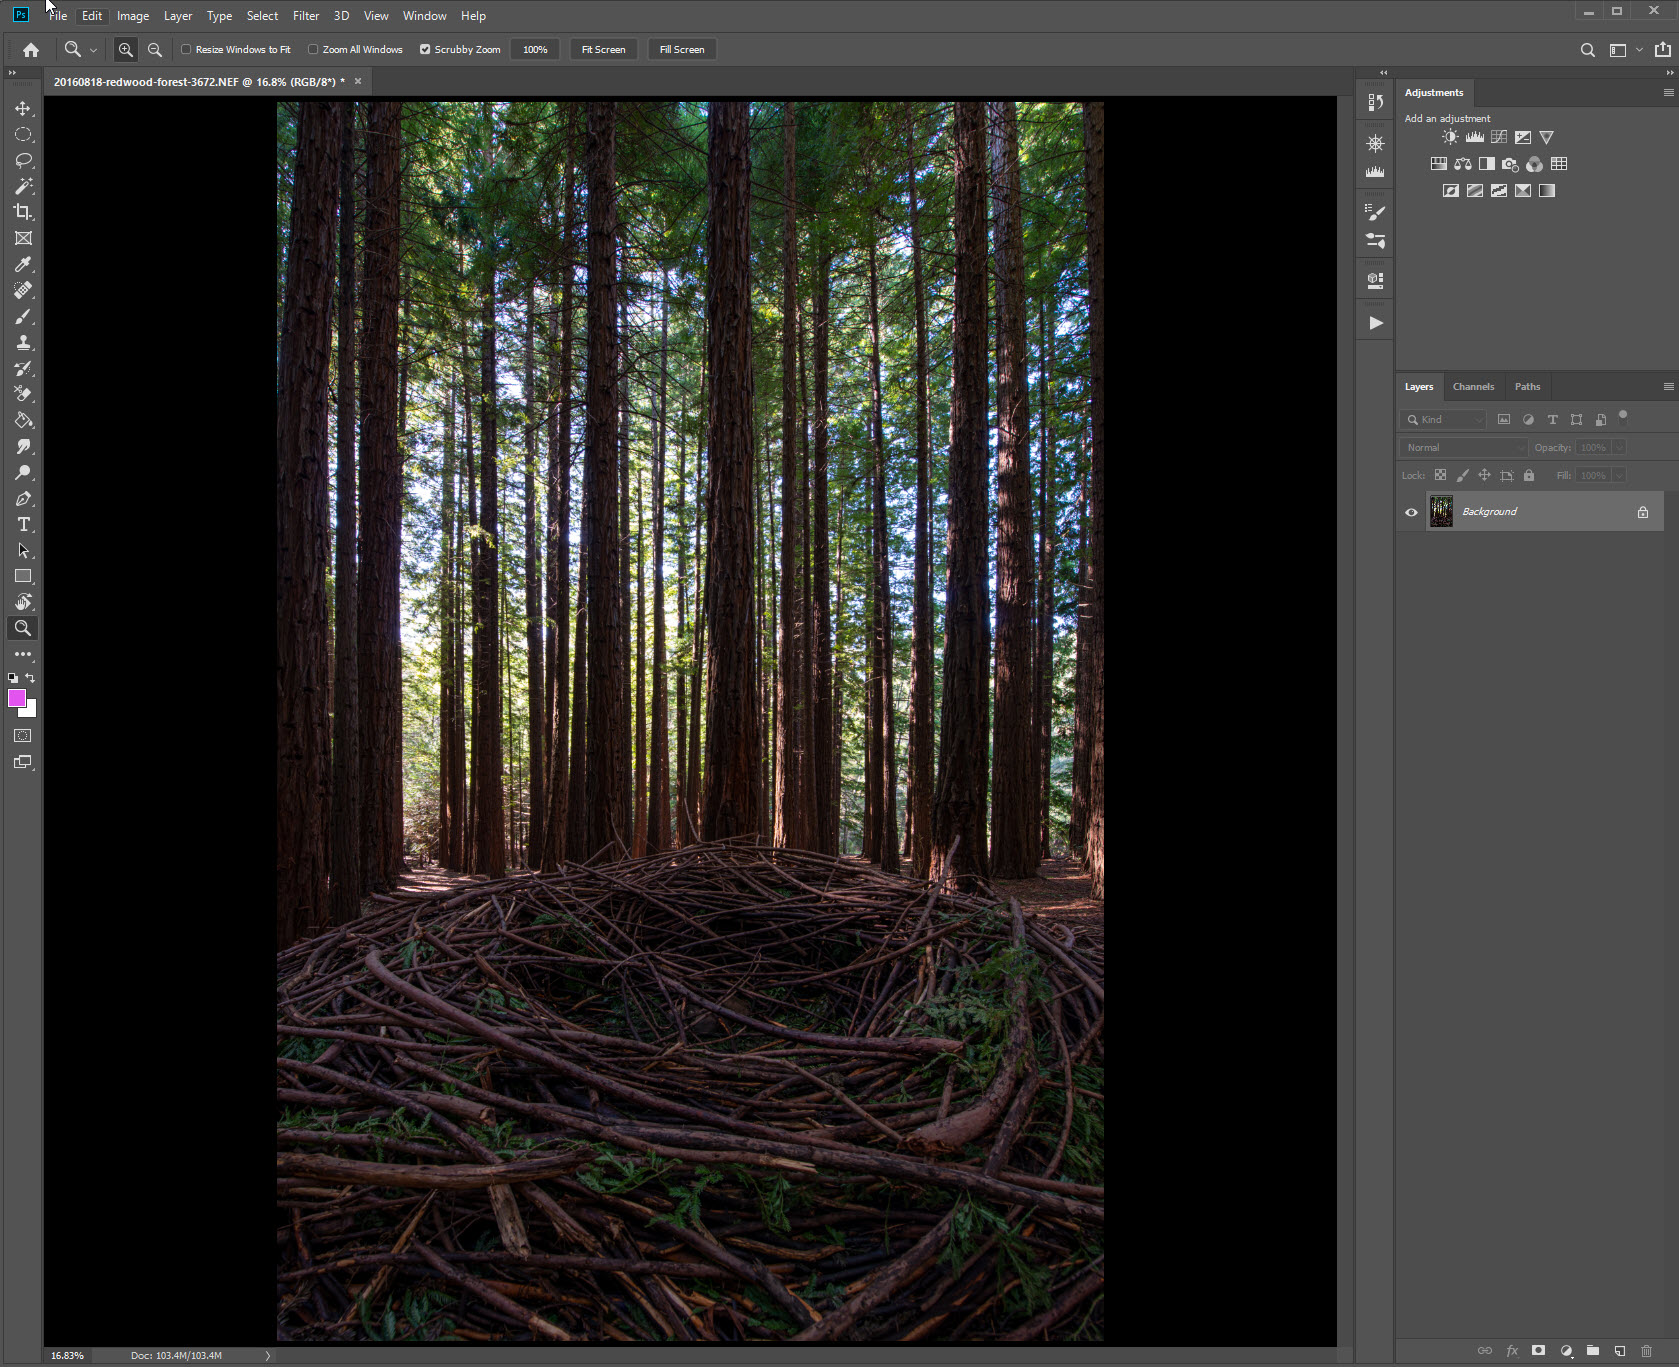
There are a lot of things you can do to this for yourself, but my primary concern is the trees, so we are going to concentrate on those.
Copying a Layer
The first thing we need to do is copy the layer, you can do this several ways, but I find the easiest thing to do is make sure the layer is the highlighted one and then click Control J.
You can also copy the image by clicking on the image and dragging it to the new layer icon at the bottom.
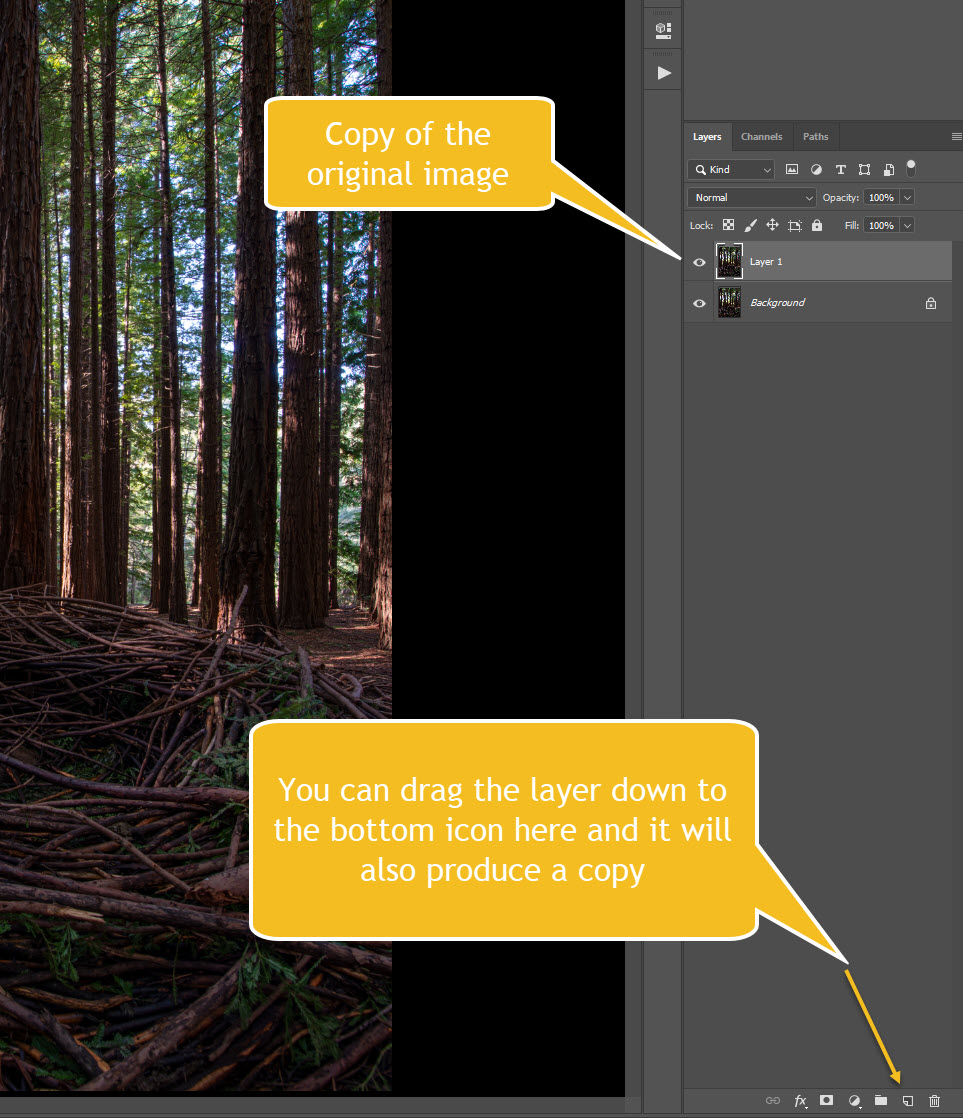
Now that you have the second layer you can start the blurring process. Make sure you are on the copy layer that it is highlighted like the image above.
Motion Blur
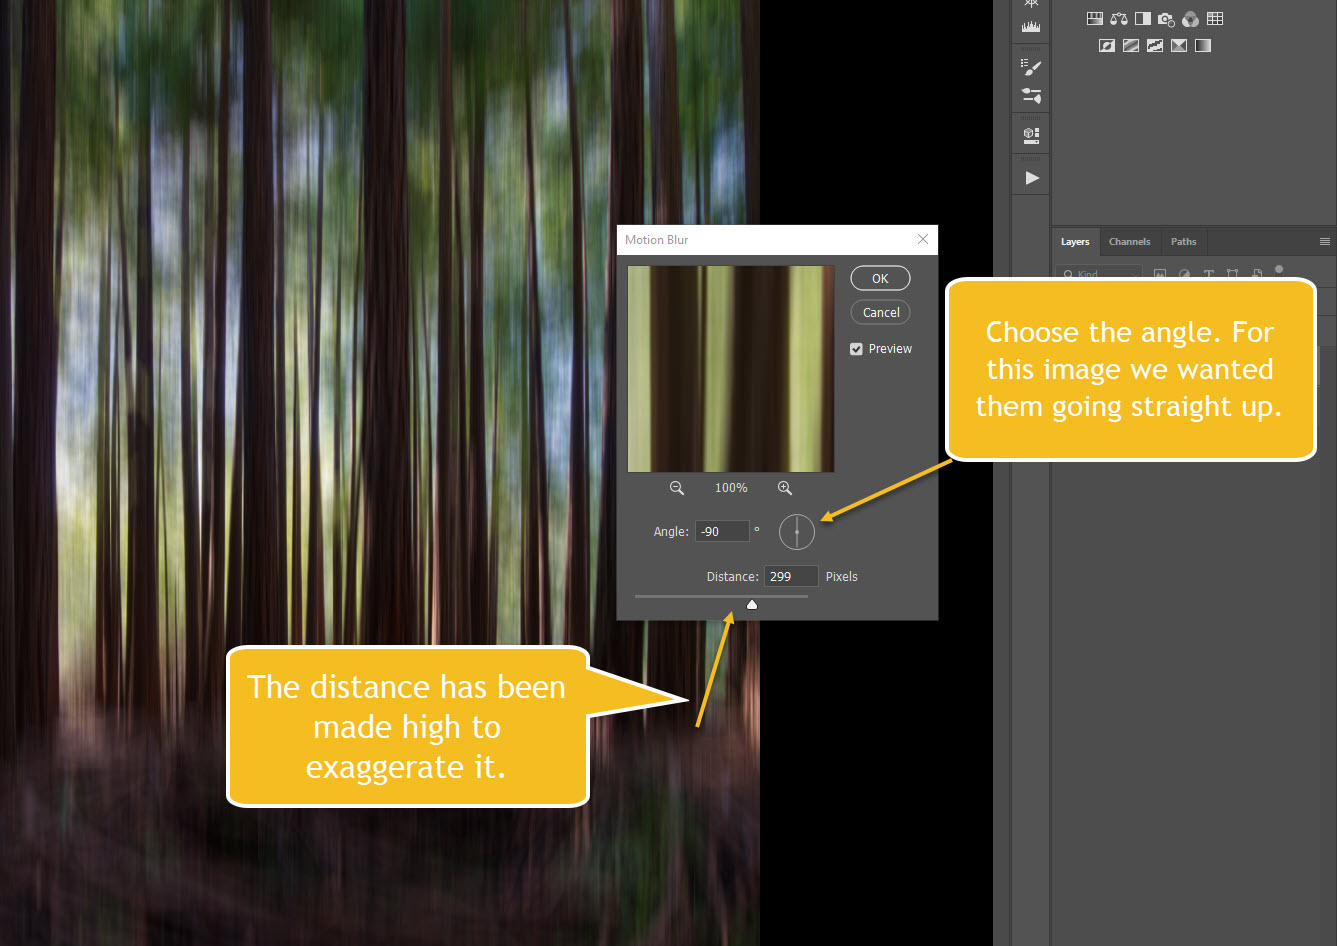
Once it is go up to the main menu across the top of Photoshop and click on Filters. When the drop-down menu is there go down to Blur and then to Motion Blue and open it.
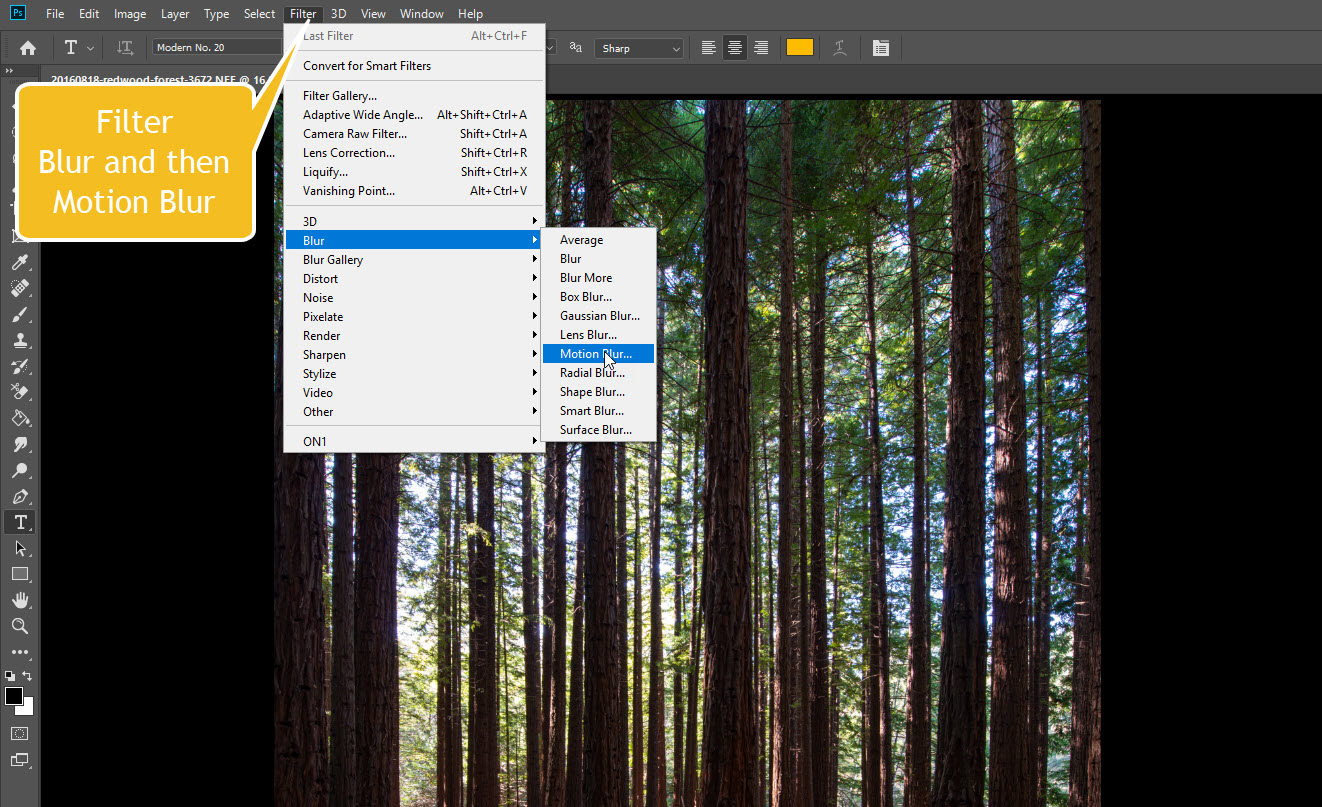
Once that window is open you will need to change the angle. Because we want the trees to look like they are going straight up, then the angle has to reflect that. The circle with the line through it is how you change the angle. You can click on the line and move it around. For mine, I have changed it to -90. It is the angle I want.
The slider at the bottom of the window decided how much motion there will be. I have brought it up a lot way to really exaggerate it. You should play around with that slider until you get what you want.
Adding a Mask
It is time to only have the motion blur where you want it. This is achieved by adding a mask to the blur layer. The mask allows you to remove parts of the blur layer so you can see what is below.
To add the mask you can simply click the icon at the bottom of the Layers panel that is the rectangle with the black circle on it. That is the easiest way.
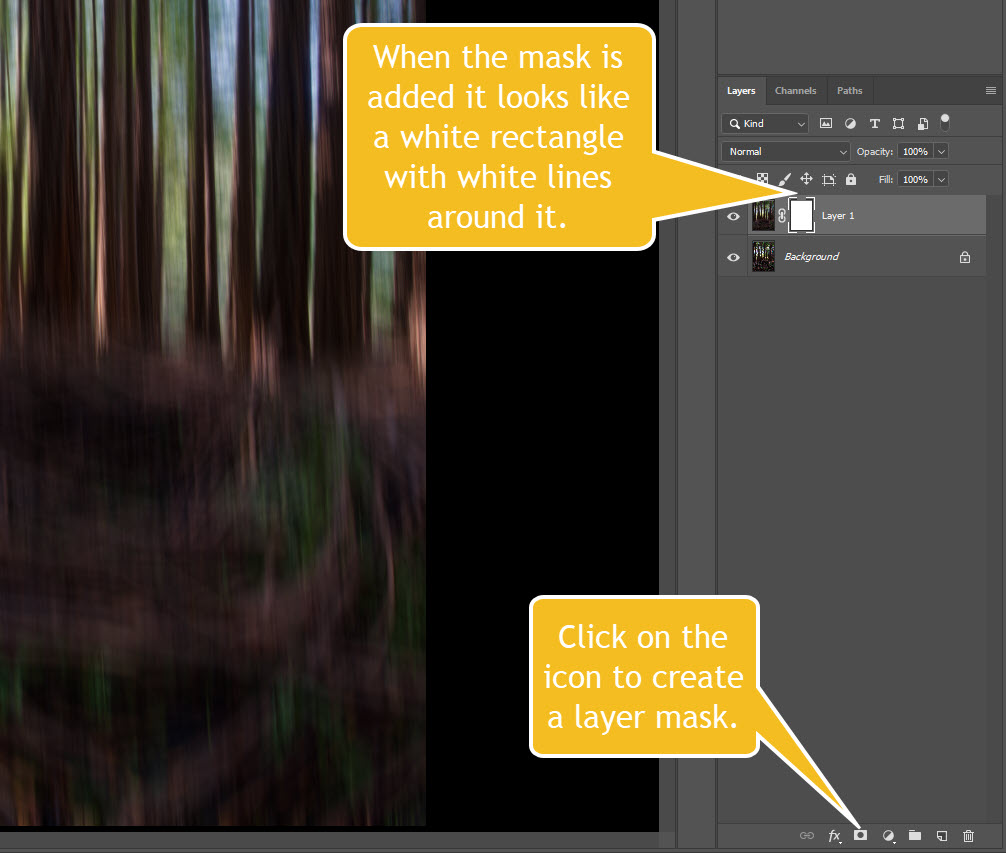
You can see the mask that has been created in the layer that we did the motion blur on. At the moment it is white. White means that it is masking everything below it. When it is like that you cannot see the layer below it, because it is masking it, or hiding it.
When you want to start working with the mask you need to make sure that the white lines are around it. They look like a border. If they are around the image then you will work directly on that and we don’t want that here.
Getting the brush ready
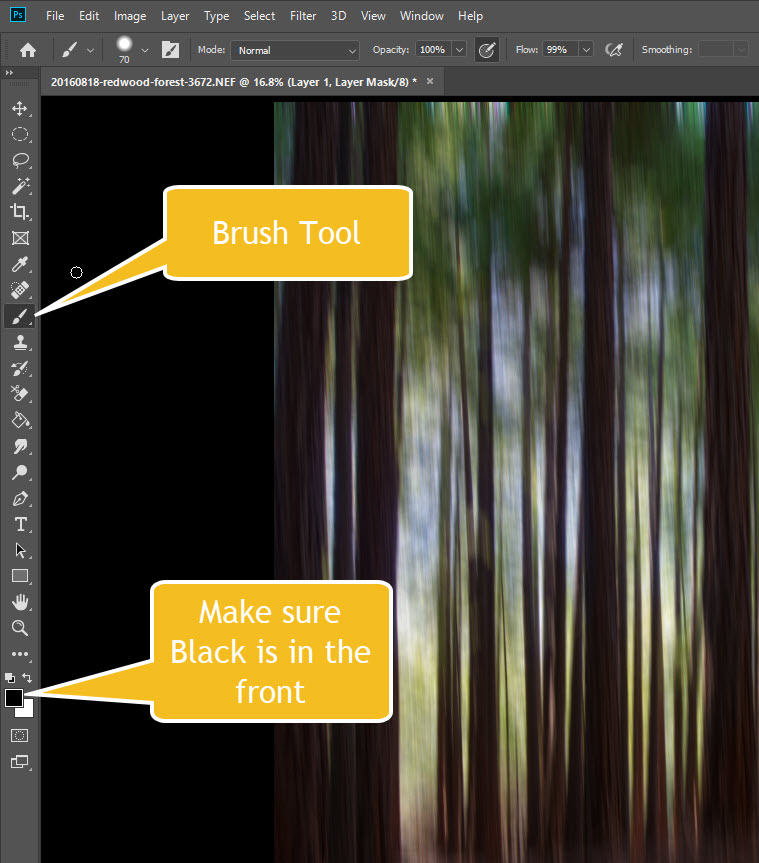
Next you need to grab your brush tool. This is located on the side panel with all the other tools. Or you can press b on your keyboard.
To make the brush does its thing you need to paint in the mask with black. To get the black you have to set the foreground colour as black. The Black square needs to look as though it is on top of the white.
Now we need to get the brush the size we want. The easiest way to do this is to click on the square bracket keys on your keyboard. The left one makes it smaller and the right larger. You can see it getting bigger or larger as you click on the keys.
You can do this with brush selection, but I always find it a bit of mucking around, when clicking on a couple of keys is so much faster. There is also a slider to do it as well, which we will look at now.
You also need to determine how soft the brush will be. The softer it is the more feathering you get with it. If you are trying to do a line that is sharp and you have a very soft brush then it will bleed in the other part. If you want to maintain that sharp edge the brush needs to have almost no feathering.
To work out how soft your brush will be you to bring up the brushes window. I do this by right-clicking on the image. The window for how to control the size of the brush and the hardness is displayed. They are both sliders. For the softness or hardness, you go to the left for soft and the further right the slider goes then the harder the brush.
You can also get the window up by clicking the icon I have pointed out in the next image.

Time to start Masking
We are ready to start masking now. The mask is selected and we have chosen what brush was want to use, plus how soft it will be.
I’m going to do a large example so you can see what the brush is doing. I hope.
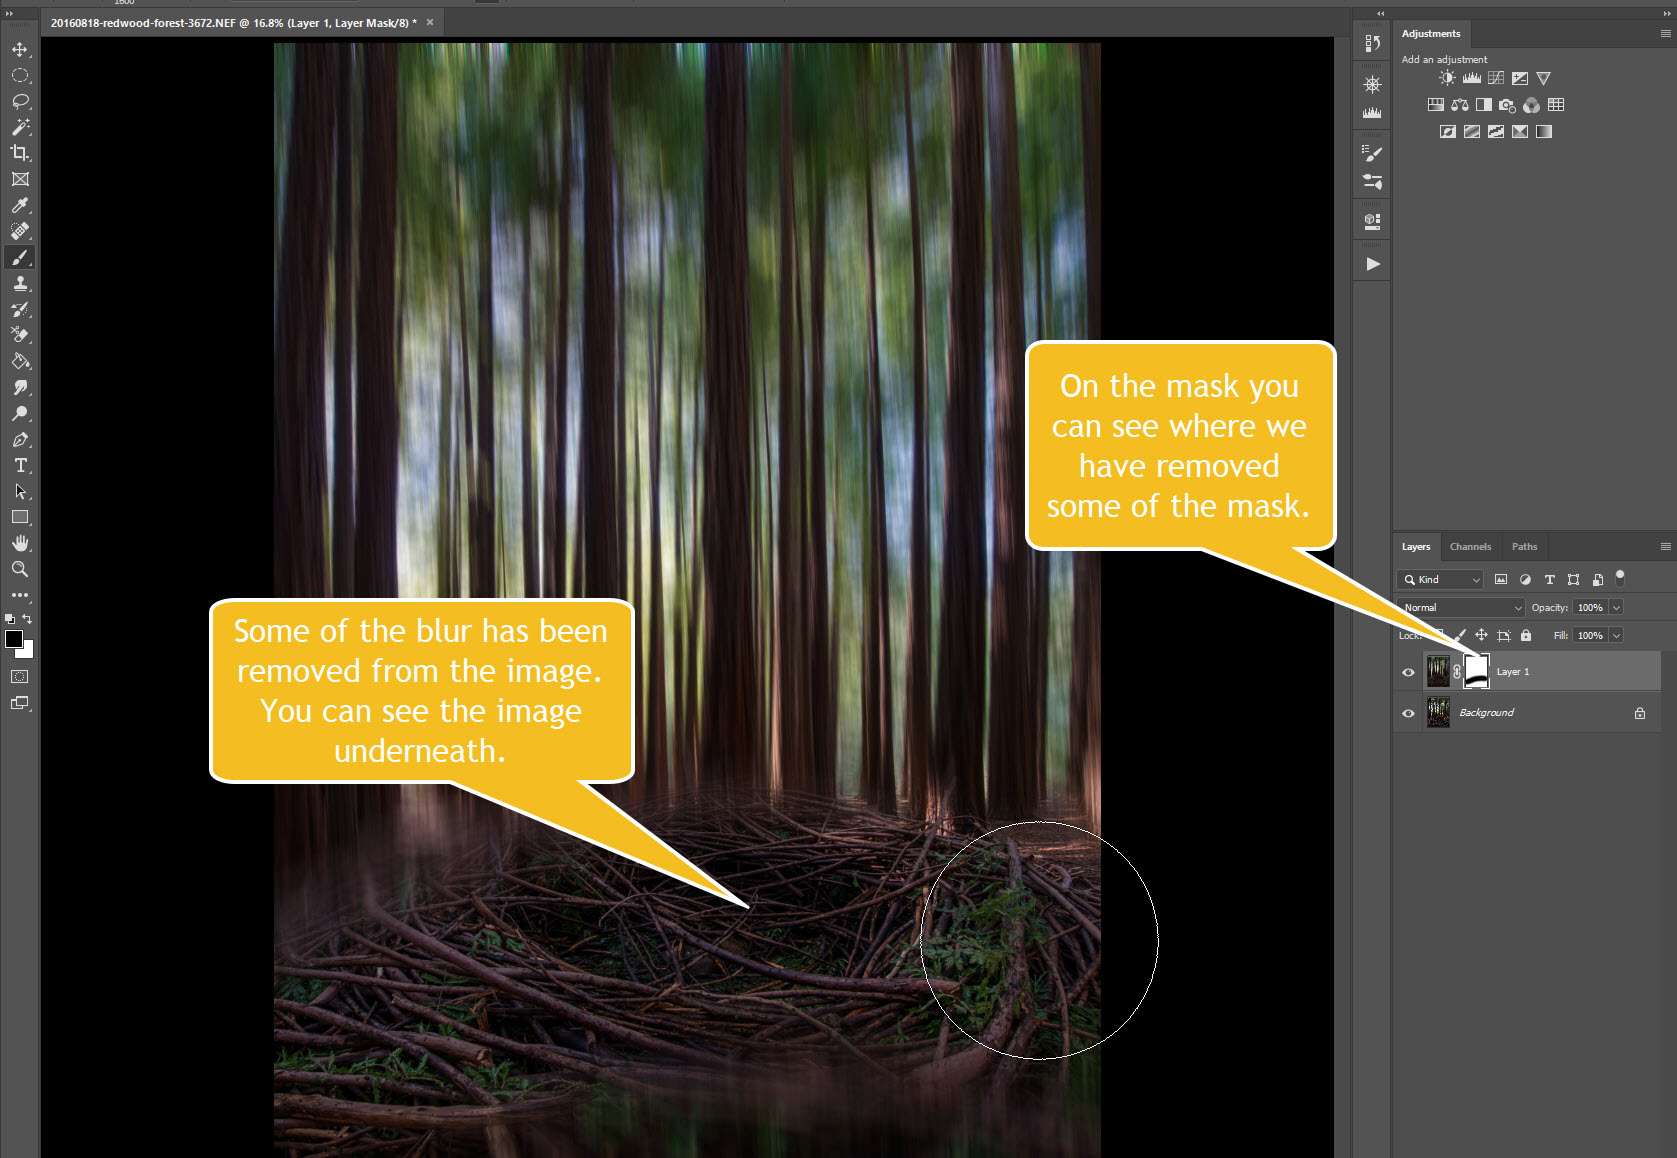
You can see the nest is starting to be revealed as it is in the original image.
The next decision is how much of the blur do you want to leave. You could remove everything from between all the trees, or just have the nest at the bottom. This is something you need to think about with your image.
For this one, we are just going to leave the nest. I am also going to leave the ground as it was. So I will do that now.
You can see there that the nest and many parts of the ground behind are sharp with no motion blur. It is a bit rough, but I’m sure you get the idea.
When you are masking if you make a mistake and mask or remove something you didn’t intend to, then press x on your keyboard and it will set the foreground colour to white. Then paint back what you took away by mistake.
Let’s take a look at the mask. You can bring the mask up on top of the image so you can see exactly what was masked and what wasn’t. Press Alt on your keyboard, hold it down and then click on the mask, you should see this.

This is also a great way to make sure you have masked everything you wanted to.
You see by the edge of the large black area that my brush was fairly soft. Can you see how it feathers out?
The final image
That is about it really. Once this is done you can go and do what you like to the image, or just leave it there.
Video
I thought I would try doing a video for you as well. This is the tutorial in the video. I hope it makes sense.
This video is on my YouTube channel.
I hope you have enjoyed this tutorial. If you think I am any good at doing these and would like more, please let me know.
Love it – thanx!!
You’re welcome Nora.
Great tutorial thanks for the images and screen shots. Some tutorials on YouTube go so fast it like watching a speed contest to see how fast they work. This is perfect for me. Keep it up please.
You’re welcome Rob, and thank you. Yes, I was trying to make sure that I didn’t go too fast and repeat what I did. I will try to do that.
This is great, Leanne! I need to bookmark this, so I can go back and study it to learn. Thank you.
No problem Tim, thank you.