Since this is a new beginning for this blog and you are all here I would like to do some new things. One thing that I would like to go back to doing is looking at an image and seeing how I processed it. More a discussion on it rather than a tutorial, but perhaps over time I might start doing some of those as well. So this is the first of my posts on the Evolution of an Image, and we start with one I call Going Through.
Evolution of an Image
The image for this discussion was taken up in the Mallee last week. I had lots of plans of getting lots and lots of long exposures, but the weather was unseasonably warm, or hot if you like. It also meant bright light and not many clouds. A couple of times I managed to, and I pretty much got what I wanted, but I think it might be the start of it really. It will be good to get back and try more.
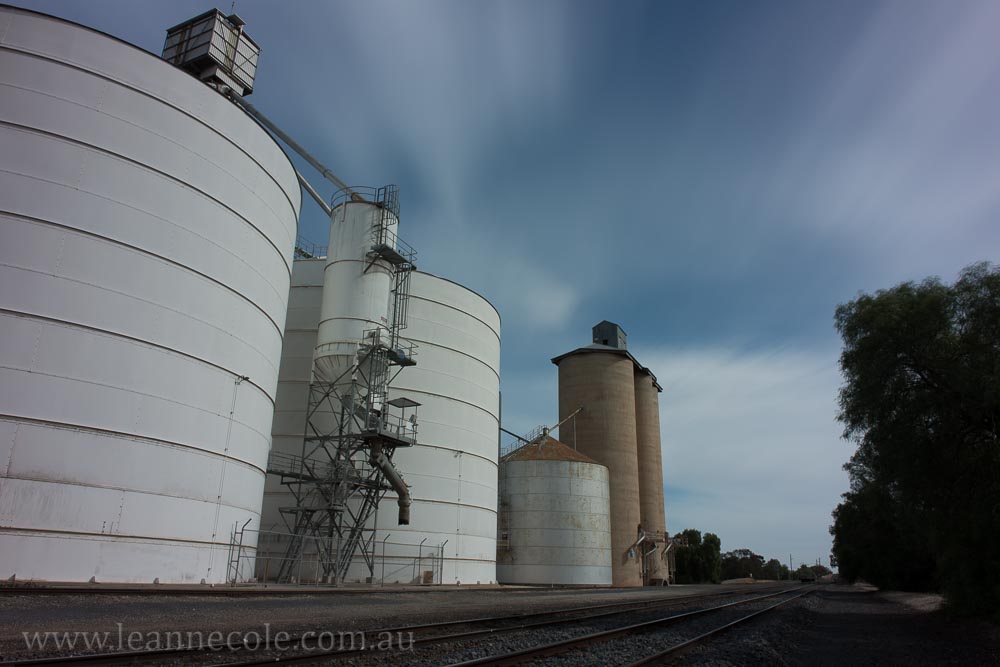
This is the basic image that I managed to get. I love these silos, they say the Mallee to me, however they are no longer used, like so many things there.
Nothing has been done to this image, and this is how it was shot. It was a four minute exposure with the Firecrest 16 ND Filter from Formatt Hitech and it was starting to get too bright so I had to make some adjustments. I am starting to think I might need to get the Firecrest 3 as well, do some stacking, especially with our harsh light.
Starting the work
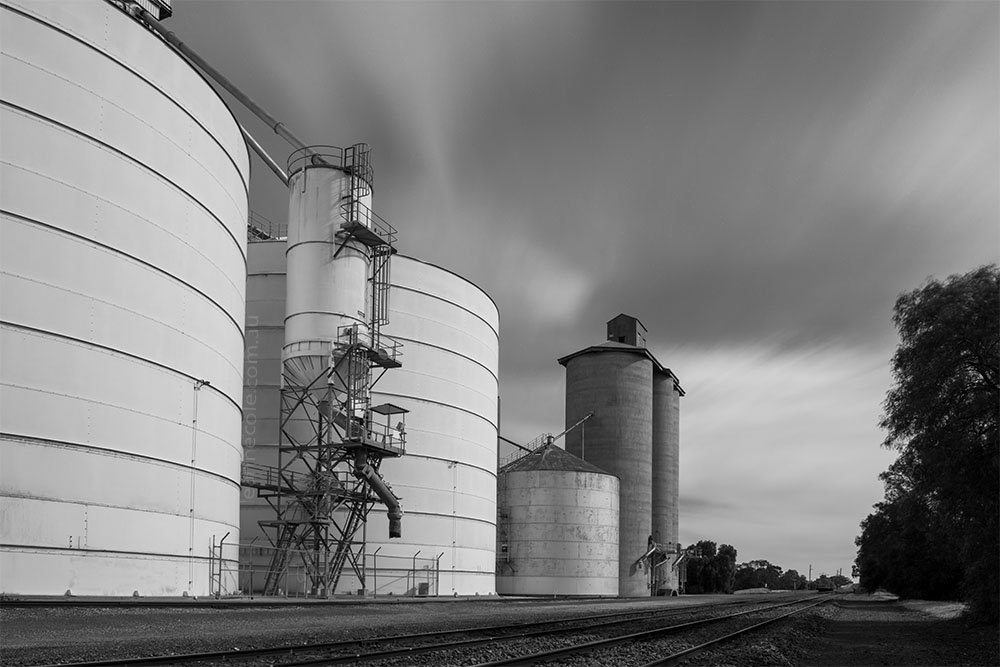
Once I got it home I opened it up in Adobe Camera Raw to make some preliminary adjustments. I always do these images in Adobe Photoshop as I know I will want to do things that I can’t do in Lightroom. It was also converted into a black and white image.
You can see the clouds moving and the black and white conversion allows for more concentrated effort on the textures and patterns. We can get too distracted by the colours.
Do more of the work
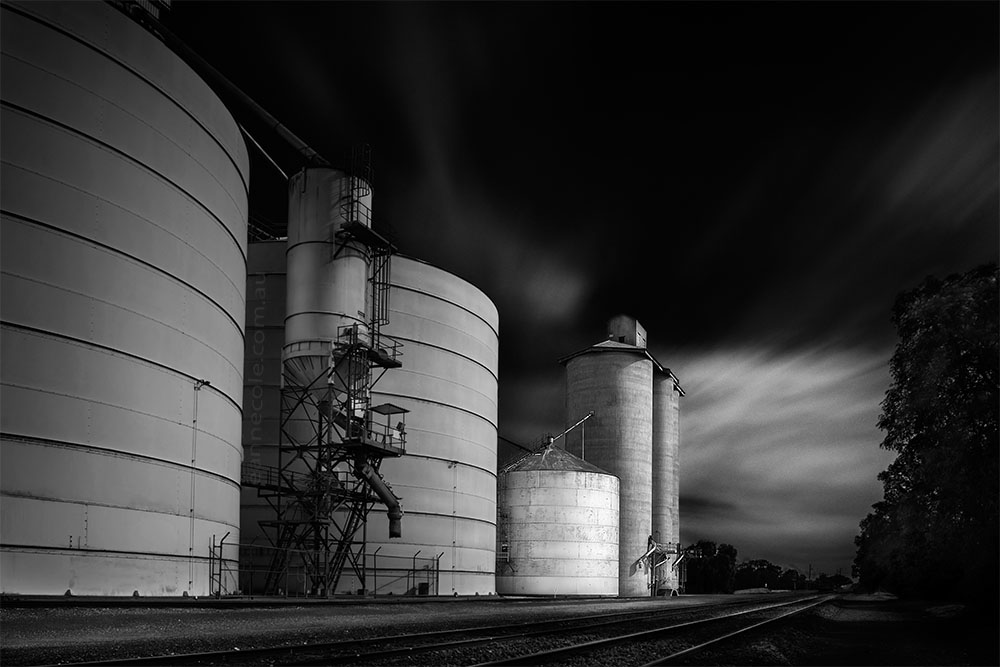
Lots of things were done to the image. The sky was darkened because Dark skies in images are wonderful. I like that effect and Ialso put some noise into the sky to help with any distortions that can happen as you darken it.
Once work started on the silos themselves next and I wanted people’s eyes to settle on the ones at the end. The oldest silos, and the ones that you see everywhere in the Mallee. They are no longer used, so they are the subject for me. The silos on the left were too bright, so I had to work on them to take the focus away. I like dodging and burning so did quite a bit of that all over the image.
There is a lot more contrast in the final image. The silos stand out more, but the ones at the end get a little lost. Plus, I knew that I would want this image in colour.
Getting the final look
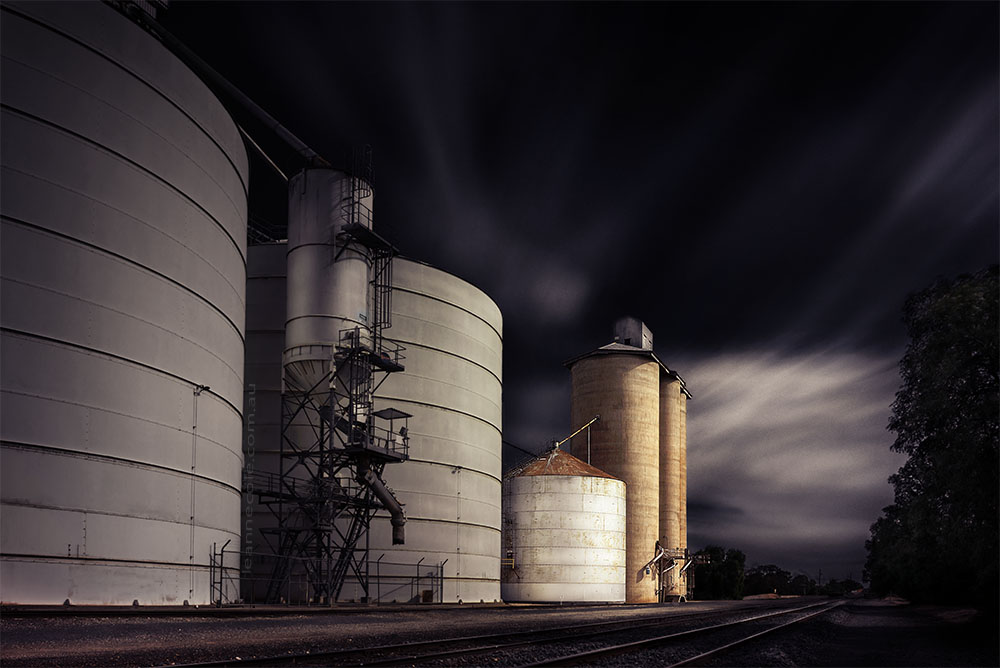
I converted it back to colour and my orange silos were back. Sometimes when you convert them back you can end up with some over saturated colours. That can ruin the image and you can’t fix it. This was one that I could. I chose to get rid of a lot of the colour from the sky, it wasn’t the subject. More work was done on the silos, so in the final image they stand would out. Though as a final bit of processing I also put some purple into the shadows.
I know some people are going to prefer the monochrome version, but for me it is the colour one. It is a much stronger image now. For me your eyes go to the end silos.
This image is also for sale.

Great job Leanne! Love that you show the whole process! Colour one I like the best aswell.
Thanks, it was an interesting post to write, glad you liked it.
Hi Leanne. I really enjoyed learning your process for this shot. You really achieved your goal–highlighting the silos in the rear and drawing our eyes from the front to the back of the line of silos and lingering on the sky. Wonderful.
That’s great to hear Patti, I am glad you agree with me in that I reached my goal. Thank you.
Absolutely, Leanne. Great work.
😀
I like both the B&W and the colour ones. I think I need more practice and to do a lesson (or 50) for lightroom and photoshop.
Thank you Shona, interesting, good to hear your thoughts. Well, I do teach both of those if you are interested, details are on the site.
An interesting walk-through of the main processing steps. The final image is a powerful one and the eye is immediately drawn to that furthest silo. Nice work,Leanne.
Thank you Andy, it has been good to hear that others like hearing the thought processes. I’m glad to hear that your eye goes where I was hoping it would go as well.
I like what you did and the colour version. It’s muted and so the it’s still the lines and the mood that strike the eye!
Thank you Cybele, it is an interesting process. I hadn’t thought of the lines.
I love reading and understanding how an artist creates an image. You have certainly done so here. I love what you did and you give just enough explanation on how you did it. I’ll be an avid follower of these “discussions”. Thanks!
That’s great Emilio, it has been good to hear how many have enjoyed the post, I will have to see what else I can. Thank you.
Hey Leanne .. I love the focus on the two distant silos.
That’s great Julie, thank you.
Always so interesting to read your explanations of the art form!
Thank you Pearlz, that is good to hear.
They are all beautiful images, Leanne. However, the final last image looks more dramatic.
Thank you Noel, it has been good that most have agreed with me.
I tried to sign up for email updates, but it says I’ve blocked them which I haven’t. So I’ll keep bouncing over when I can, but I have no idea why your site thinks my site doesn’t accept email updates. I love your new site, by the way. It’s lovely.
That is very strange Marilyn, I have no idea why that would happen. though you should get updates in the reader, I hope. Thank you, I am happy with how it is going too.
Love seeing you getting back to talking about processing an image Leanne 😃
This one is stunning with the dark skies and the focal point of the silos.
Thank you Robyn, it is nice to be doing it again, I am going to try an do more.
It good to hear that I seemed to have hit my objective. 😀
That’s great and will look forward to seeing more Leanne 😃
😀
Many thanks for a first-class photography lesson! It taught me a lot about what one can do with a picture that looks quite ordinary at first and then is being transformed into something that is truly part of our unique perception of the world around us.
You’re welcome Peter, that is great to hear. I hope to do more, seems people have enjoyed this. Thank you.
Well done 🙂
Thank you.
I agree with your train of thoughts on this.
That’s great Cardinal, thank you.
Wow beautiful Leanne! Thank you for sharing your process. A lot of work goes into the magical photos you create!!
No problem Jodi, and yes, I spent all day on that photo, lots of thinking and looking and working. Thank you.
Yes, I prefer the colour one.
Thanks for letting me know Gypsy.
this is really fantastic! I love the photograph. Your discussion of what you did, is excellent. I thoroughly enjoyed the post and loved that photo… in color. 🙂
Thank you Debi, it is good to hear that.
Like a few others, I also prefer the final coloured image. It’s simply magical. Many thanks for sharing this process as it has definitely given me a few tips (as an amateur photographer) on different ways of editing an image to accomplish varying effects 🙂
Thank you so much. You’re welcome, nice to hear that people have got something out of the post.
Wow, definitely the color. It’s beautiful! I love hearing how you did it step by step. Not that I know how to do most of the things, but it’s still great to follow along.
Thanks Nicci, I like that one too. That’s good to hear, it is more about the thought processes too.
Thanks a lot for sharing your work process. It was very much educational to me.
That’s great to hear, thank you.
It’s a great image. Thank you for describing processing . Given me a couple of ideas.
Thank you and you’re welcome Helen.
Your final photos have a very distinctive ‘look’ and it’s interesting to follow what you do in processing. I look forward to more in this series, thanks for taking the time to set it out. And I agree — the colour version just draws the eye to the old silos.
Thank you, it is nice to know that people have liked it. You’re welcome.
Enjoyed your post. Not many if any, posts i’ve come across discussing the
process of image development.
Thanks
thank you, glad you enjoyed it. I share a lot of stuff now, though haven’t done much here. Hope to do more.
Amazing work. I liked your explanation of how you arrived at the final image. Love it.
Thank you Anne, it is an interesting process what you think as you are doing it and what you want to do.
Thank you for sharing the details of your processing! Admiring your openness.
No problem Mar, thank you.
Awesome image Leanne. Thanks for sharing the process 🙂
Thank you Norma and you’re welcome.
The orange glow on the old silo’s really makes this shot, it reminds me of images of the midwestern US shot in the 1950’s
That sounds like exactly the effect I was trying for Russ, thank you.
Beautifully done, Leanne. Normally I would prefer the black and white but I agree with you, color is a good addition here. Congratulations.
I think this also works because it is almost monochrome, just a little bit of colour, I like that effect as well. Thank you Barry.
I agree the final color version is better than the B&W one. The warm glow on the distant silos enhances the contrast.
Yes, I like that warm glow too Doug, thank you.