It is the second day and I redid what I did yesterday, except I changed part of the experiment, and today my bread was not so flat.
So going on from yesterday’s attempt I did everything exactly the same, except for the bulk rise.
Yesterday’s bread
Remember yesterday I was saying that the bread was flat and the crumb was quite dense. I was trying to work out what went wrong.
It seemed to me the most likely cause was the original bulk rise and the dough was over-proofed. The dough was very pillowy and bubbly. Other over-proofed bread has turned out flat too.
Today’s effort
The experiment was to do everything the same, exactly, except to make sure the first rise didn’t go too far. I made it in the afternoon, kept it warm during the stretches and folds and then let it sit in warm water for another couple of hours.
It was looking good and so I made the decision to go for it. I turned the dough out, rested it and then shaped it. Again, I put it in the fridge overnight and when I woke up in the morning I put the dutch oven in the oven and turned it on.
Not long after that I took the dough out of the fridge and let it sit on the bench for around 40 to 45 minutes before I put it in the oven. Once in there I set the timer for 20 minutes.
The dutch oven
Take a look at what I saw when I took the lid off the dutch oven after the 20 minutes.
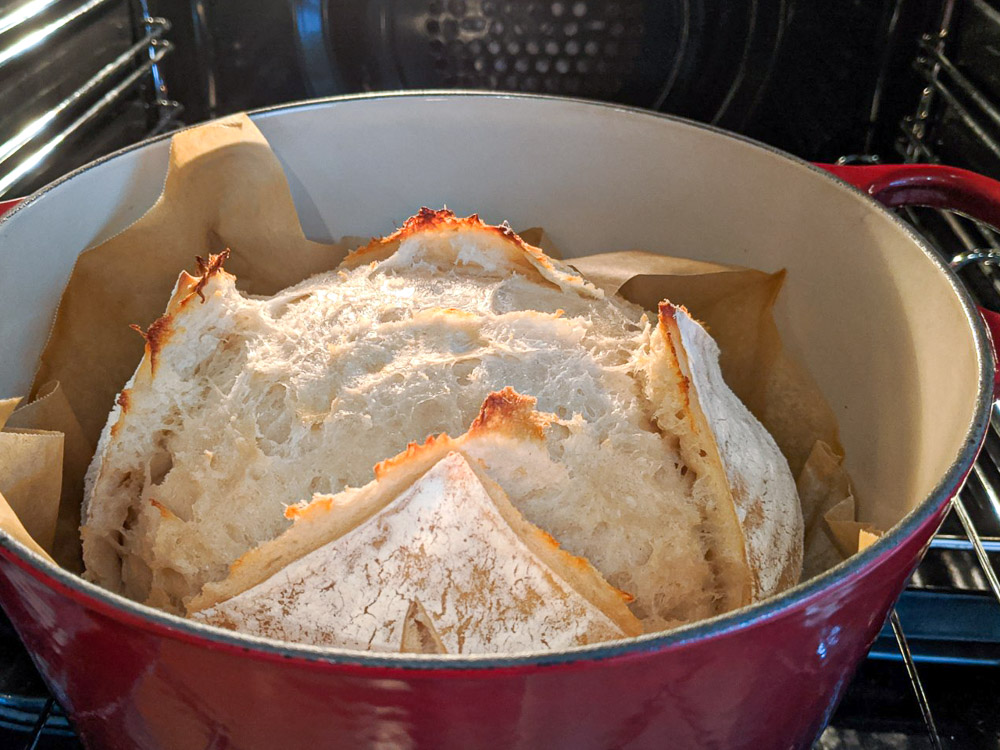
Lots of lift and oven spring, I think they call it.
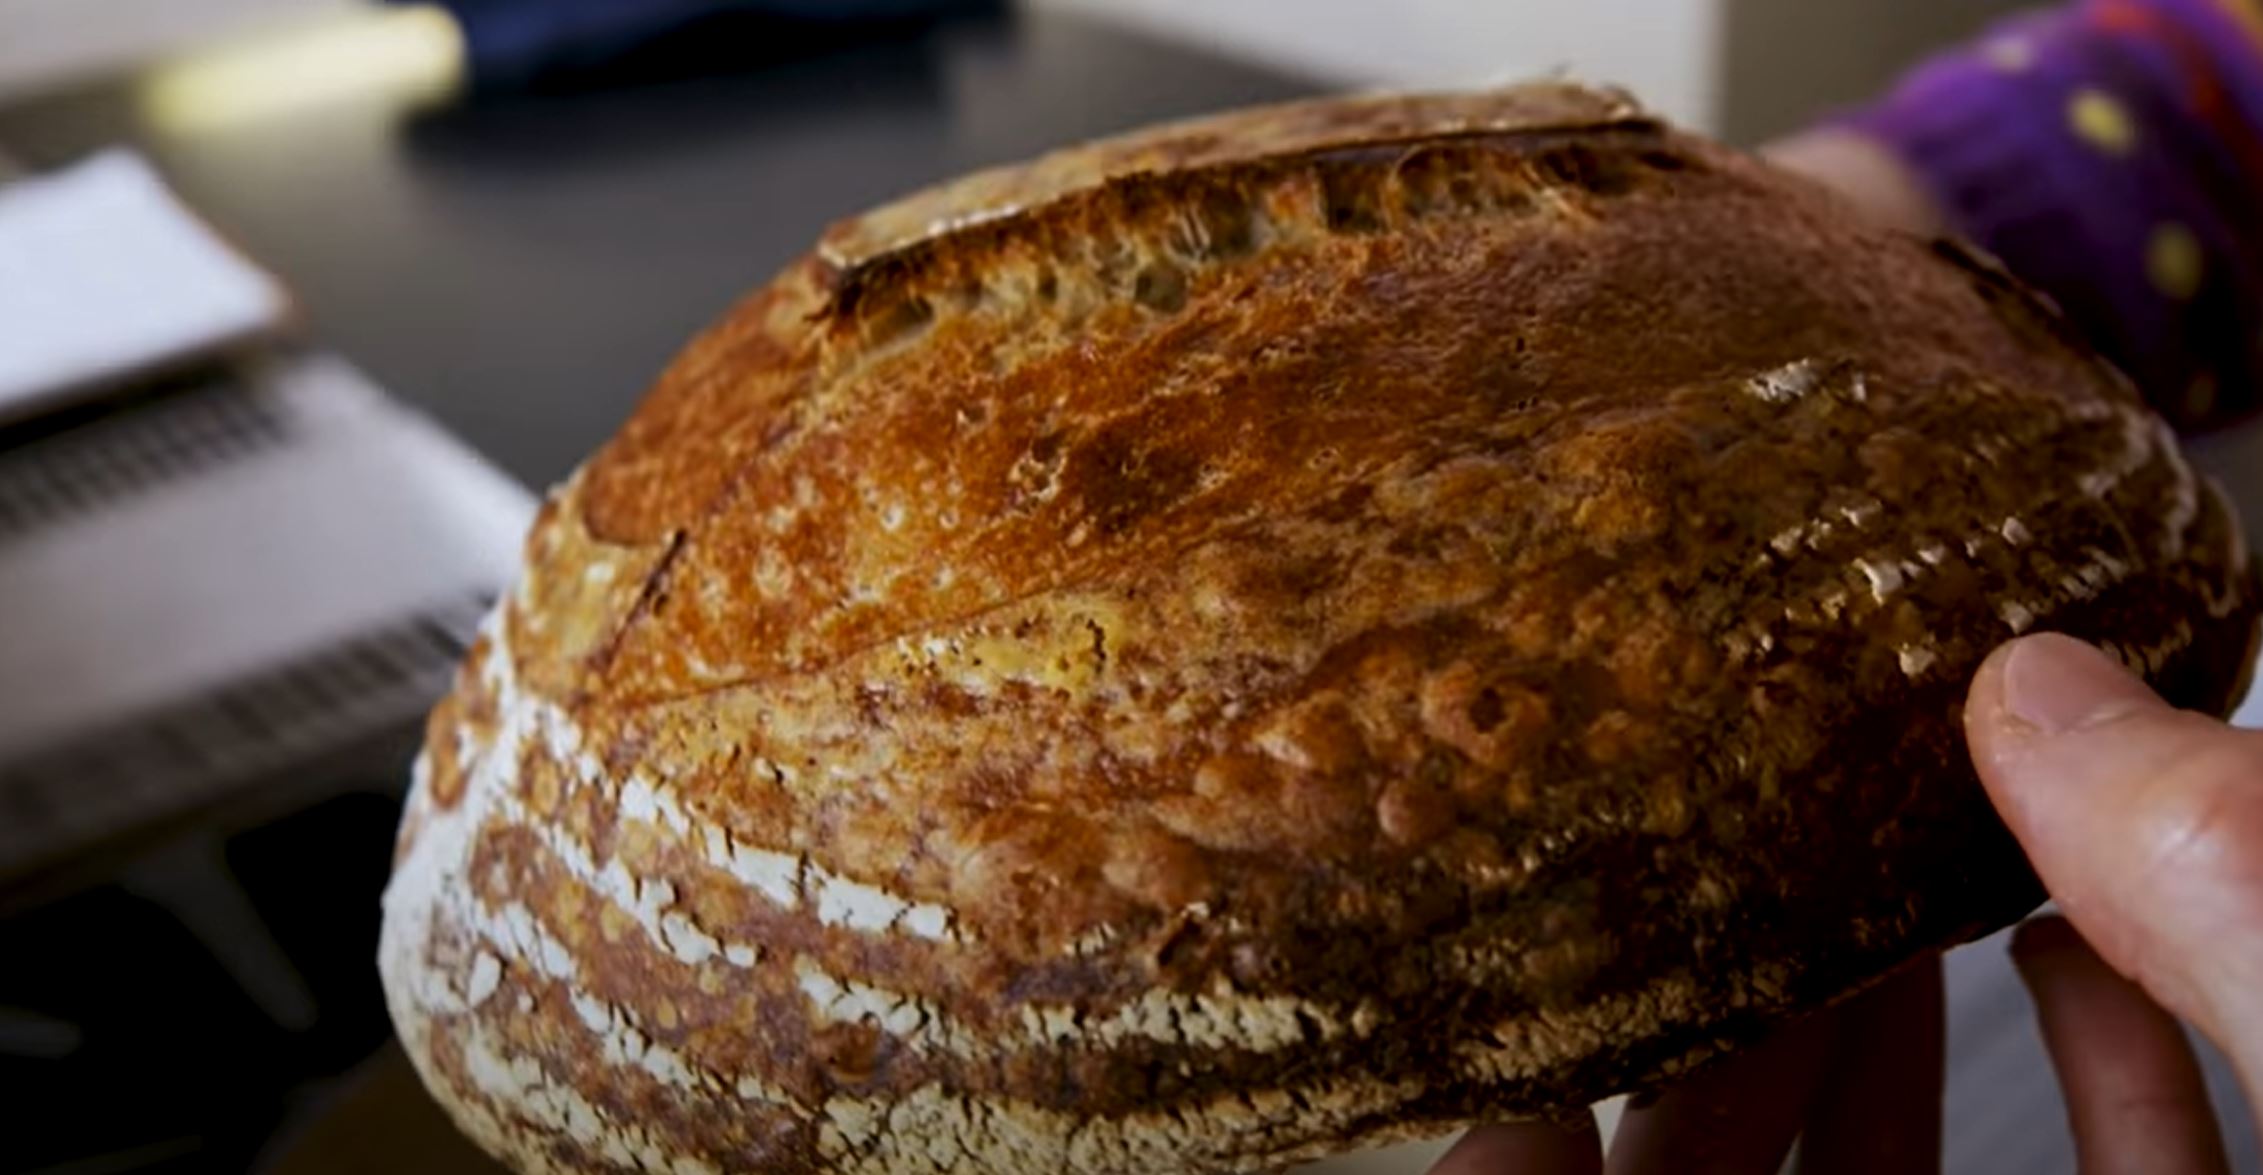
Then I took it out of the pot after almost 20 minutes to cook in the oven.
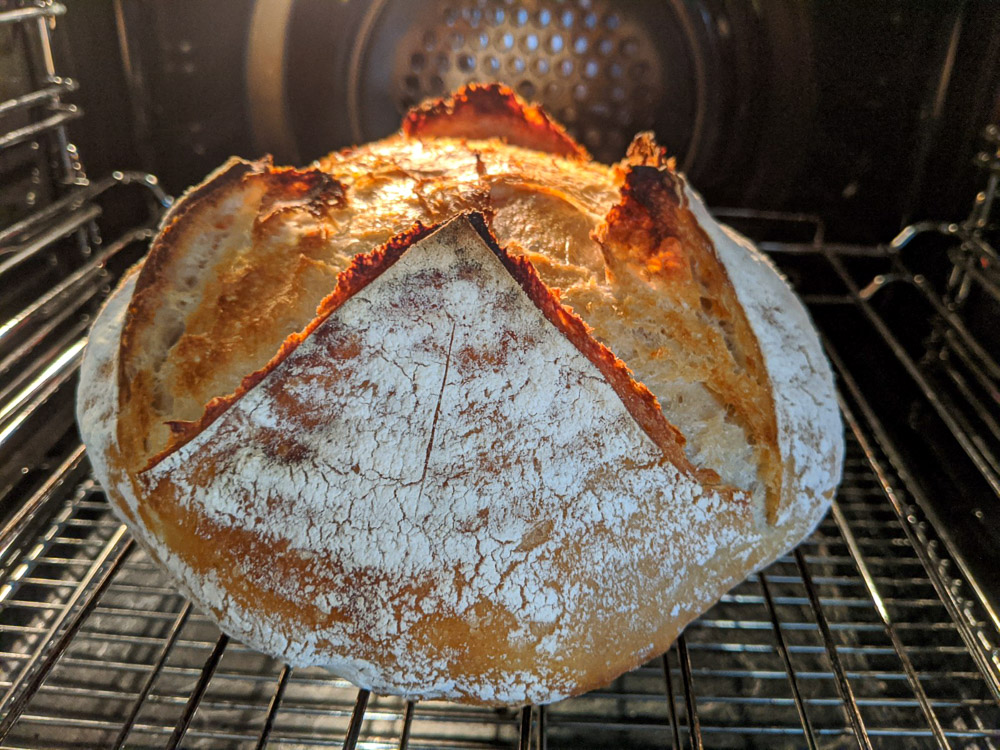
This is what I was hoping to find. It didn’t spread out too much and it looked like it was coming out through the top. Look at the ears on it. When you picked it up it felt light and not too dense. I was doing a happy dance that’s for sure.
Now to the crumb
When we are talking about the crumb we are referring to the inside of the bread. How many holes you want is up to you, but it should look holey and not all bunched together.
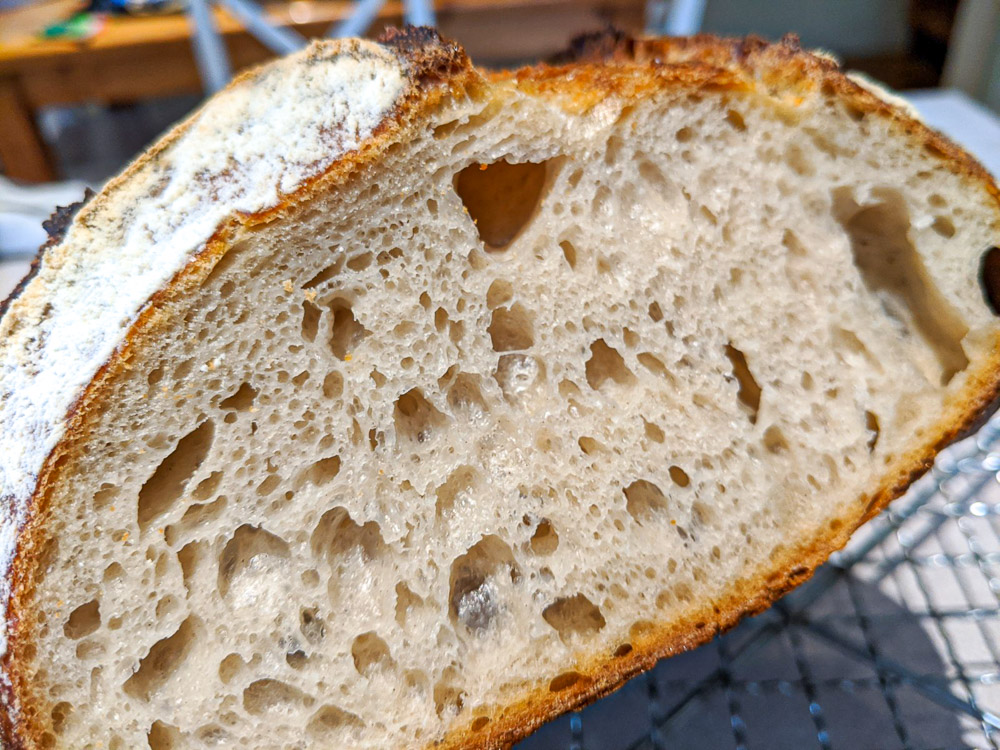
That is what you want to see. Well, it is what I want to see. I love slicing into it and seeing this.
I did a comparison between yesterdays and todays.
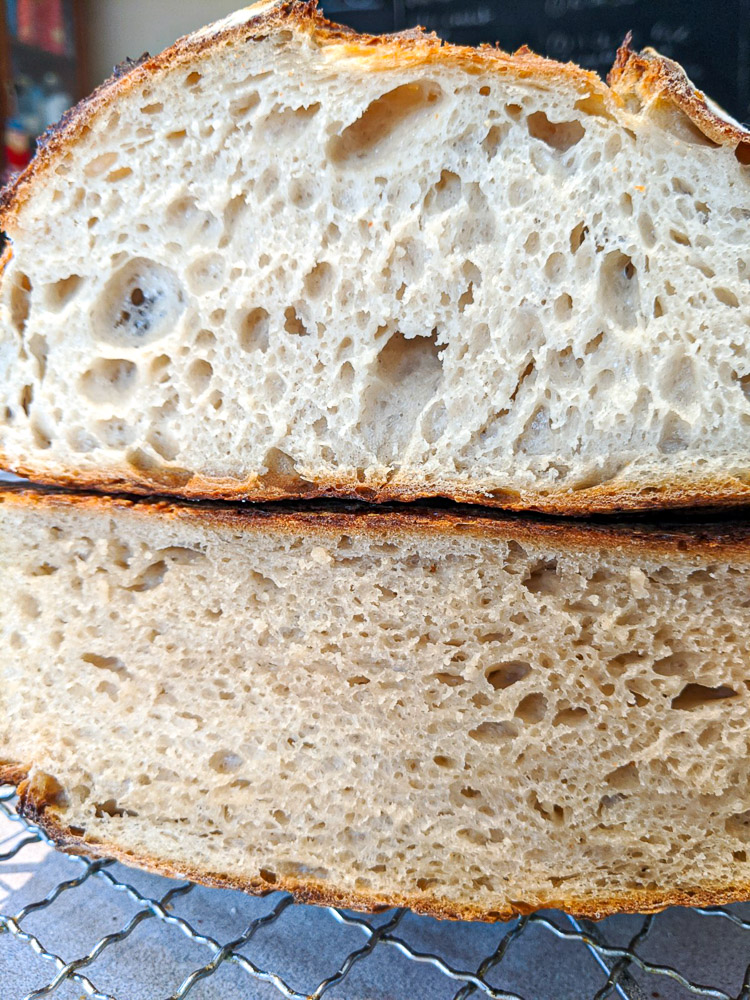
The top being todays bread. The texture between the two is so different.
Conclusions
If you over-proof your bread it won’t rise in the oven and the crumb will be dense. So while sourdough can take a lot of time to make it is possible to over-prove it.
Lesson learned.


I’ve been baking sour dough bread for over two years now at our local historical inn. We only bake it once a week so we keep our starter in the fridge and feed it every week after we take what we need. After we mix all the ingredients we let the dough rise for 40 minutes. Then we remove the dough from the bowl and shape it into round loafs. We let it rest on the board for another 40 minutes and then reshape the dough and place the round loaves in the round baskets. Again we let the dough rise for 40 minutes and then we remove the bread from the bowls and bake them in our wood fired oven. This method works beautifully for us. We make about 25 to 40 loaves every week and another 40 to 60 loaves of other breads, including rye, rustic white, garlic and thyme or rosemary, cranberry and pumpkin seed, wine and walnut, and a variety of seasonal breads. The whole process for our sour dough bread starts at 8:30 in the morning and goes into the oven at about noon. Over proofing the dough is the one thing that spells disaster for our recipes. Hope this is helpful.
That is a short time for your sourdough, do you put yeast in it as well.
I must admit for the second rise I often only leave it for about 30 minutes.
Your loafs looks excellent! Yum!
Thank you Chris, it has been great to enjoy fresh homemade bread. I am really enjoying baking it.
Looks really good. I have thought of trying sourdough but I don’t really like the taste. I prefer the wheaten taste of wholemeal bread.
Sourdough has rather a distinctive taste, though you can make it with wholemeal flour, but I get that it isn’t for everyone. Thank you RJ
Looking great!
Thank you Syamala, nice to get it to work.
If I close my eyes I feel like I can actually smell this! I’m assuming that it tasted as good as it looked?
Cooled but ultra fresh: Butter, jam… … heaven!
p.s. if you don’t like the first one, then *please don’t throw it away*, make croutons out of it (Basically cubes of bread in a little oil and cooked in the oven) let get cold and store in an airtight container. Delicious for with your next salads 🙂
Crouton recipe:
This works best with day old or even bread a few days older, just watch that there is NO mould!
In a large bowl toss your bread cubes with dried parsley and/or Italian mix, garlic powder, salt, pepper and some olive oil. (use oil sparingly, they should not be soggy, just enough that the garlic power etc sticks.)
Spread out onto parchment paper lined oven trays in a single layer. Cook on medium oven heat setting until they are light golden brown, stopping to turn over the cubes several times so that they get golden on all sides and quite dry.
Make sure they are really cold before storing them in an airtight container. It’s easy and delicious and you will never go back to expensive commercial croutons again!
It did smell good, and tasted just as good.
I did throw it out. I’m not a big fan of croutons, but I probably should have made it into breadcrumbs. I will have to try that next time.
Thank you for the instructions.
Leanne, this looks like a perfect bread to me, I am happy for you that you found the solution. Enjoy your baking.
Thank you Cornelia, I thought it was great too, so happy with the outcome. You enjoy yours too.
You have made me hungry, Leanne.
Sorry I can’t share it online Tim. Thank you.
Looks so good Leanne. Yummy!!
Thank you Kayleen, it tasted good too.
Ooooo looks great Leanne. Bet it taste as good as it looks. Way to persevere in getting the results you wanted! I’m sure made your whole house smell like fresh baked bread. Nothing better! Congrats Little soft whipped butter spread and honey…Oh makes my mouth water! 🙂 Enjoy the fruits of your labor! 🙂
Thank you Jack, it did taste good, so good. I think I’ve baked enough bread now that I can pretty much work out what is wrong when something goes wrong. YOu are right, the house smelt so good. Sounds good. 😀
Hooray!! 😁 Looks yummy.
Thank you Lena, if only all problems in life were this easy to fix. 😀
Definitely not flat!
Definitely not so happy to work out what went wrong. Thank you.
Looks delicious! Especially that photo of the loaf on the rack. Mmmmm ….
I have to admit it tasted delicious as well. I was a happy baker. Thank you Ludwig.