After the post I did on the night time cityscapes I had a request to give some tips on doing night photography. So I am going to give you some tips and hopefully, they will be helpful.
Taking photos at night is not that hard to do. There are just a few things you need to remember. Let’s get started.
Gear
Let’s start with gear and what you need.
To get the best photos you really do need a camera that you can change the settings. You want to be able to use it in manual mode and you need to know how to get to the bulb setting. If your camera allows longer exposures than 30 seconds then you need to know how to access those. The Fujifilm camera will let you take a photo at 60 seconds, 2 minutes, 4 minutes, 8 minutes and so on. Actually, I don’t know exactly how long it goes to.
There are a couple of other things you need too, a sturdy tripod. I tend to use my 3 Legged Thing tripod called Bucky for most of my city nightscapes. He has proven to be up to the task. You are going to be doing longer exposures so you should make sure your tripod won’t sway in a slight breeze. If you are going to all the trouble to get night shots then you want the best chance of getting sharp images.
The only other thing you may need is a remote shutter release. I know you can still get the ones that you can connect to your camera so you can lock the shutter down but many camera brands now have apps that allow you to do the same. If you are going to use an app make sure you know how to use it before you go out to take your shots.
Picking a location
This isn’t that different for daytime photos. You just need to pick something that looks interesting and has lights. Which is important if you are shooting in the city.
I like picking places that are along the river because the lights then reflect in it as well. However, anything that you find interesting during the day that is lit up at night can be interesting.
Then there are places that are boring during the day but the lights they use after dark really transform it, so look out for those.
Another thing I want to talk about is photos during a full moon, but we will talk about those in a bit.

Taking your night images
There isn’t a lot of science or technical information you need for this, but there are some things to consider.
If you put your camera on the tripod and use aperture priority your camera might tell you that you can get an exposure of 20 seconds, for example. However, that doesn’t mean you need to take a photo for that time. Sometimes if you push up the time to 30 seconds you will get a brighter image. If you try for a minute it might be even better. Maybe you go to 2 minutes and you will be wowed at the results.
You do not have to settle for what the camera says to take. I’m going to give you some examples.
When I was in New York in 2015 we stayed in an apartment that was on the 26th floor. Great views. It also had a small balcony and I spent a lot of time on that balcony doing sunrise and sunset photos. One night when I was there it was a bit windy and there were clouds in the sky and I decided to see what I could get.
This image was taken at 30 seconds.
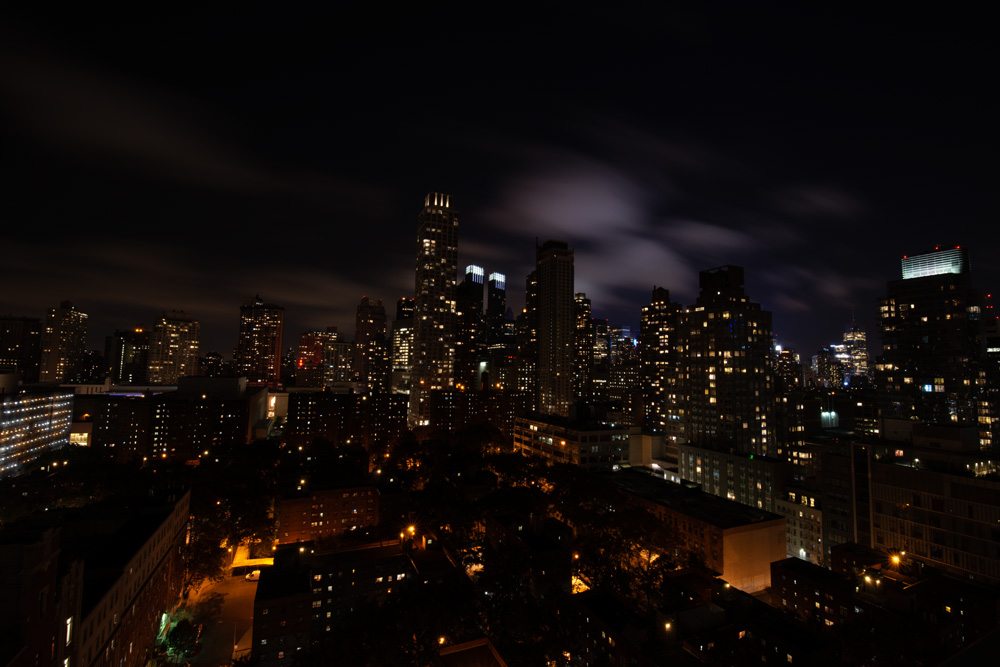
You can’t see a lot. That is what the camera was telling me to do.
So I put it up to 2 minutes.

That is a lot better. You can see a lot more of the city here.
Then I thought, what if I try 3 minutes.
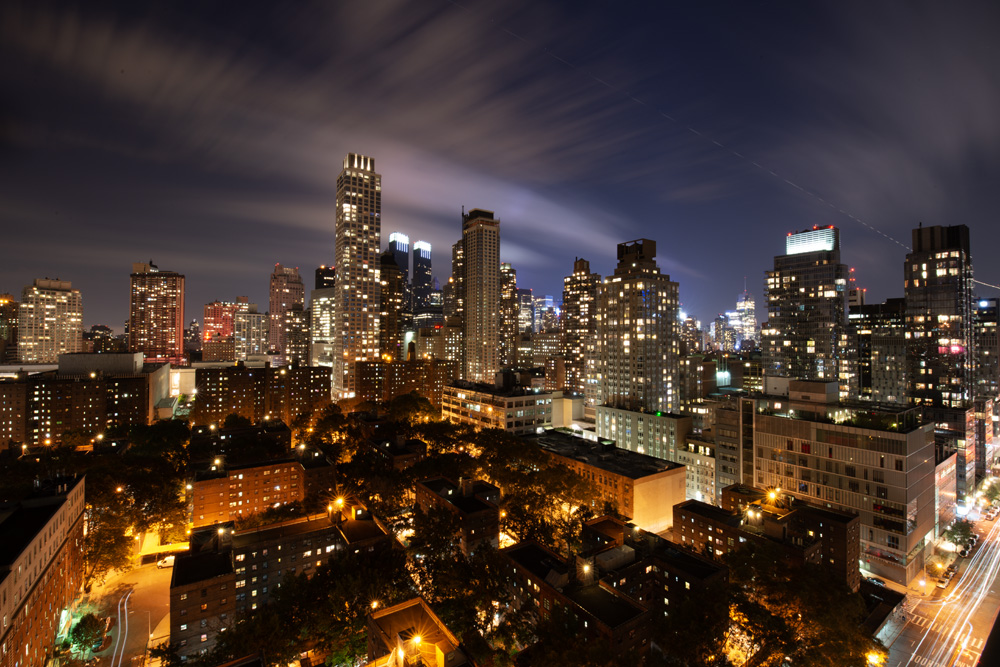
Wow, I don’t know about you, but I think 3 minutes was perfect. You can really see the clouds whirling around in the sky. The city isn’t blown out, so I was really happy with this.
I haven’t done anything to these images, they are all straight out of the camera. I will also include all these photos in a gallery at the end so you can go through more easily and compare.
To get the best photos you need to experiment with the time. Try 30 seconds, try 60, try 120 and try 180. Maybe even go longer. Remember I had a lecturer once that used to say you should be prepared to screw up your image to learn how far to go. Thankfully with photography you can just delete ones that are no good.
Really, that is all there is to it for taking photos at night. It isn’t that much different to images taken during the day except you need longer times.
Examples
I’m going to give you some examples and tell you the exposure time.
The next three images were taken in the morning, so it wasn’t quite as dark and I didn’t need as long an exposure. This image was at 2.5 seconds.
This next one was at 5 seconds.
So you can start to get more details, but I think it needs to be more time.
So I tried 8 seconds.
There is definitely more detail in that. I do wonder looking at it now if maybe I should have tried even longer.
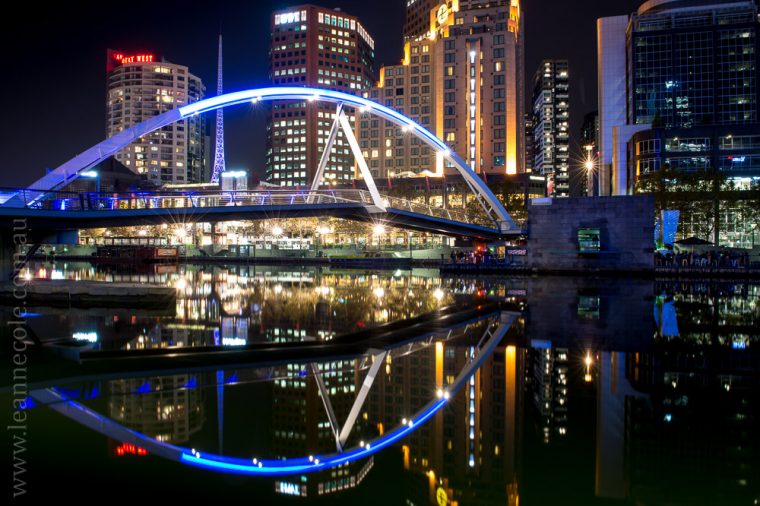
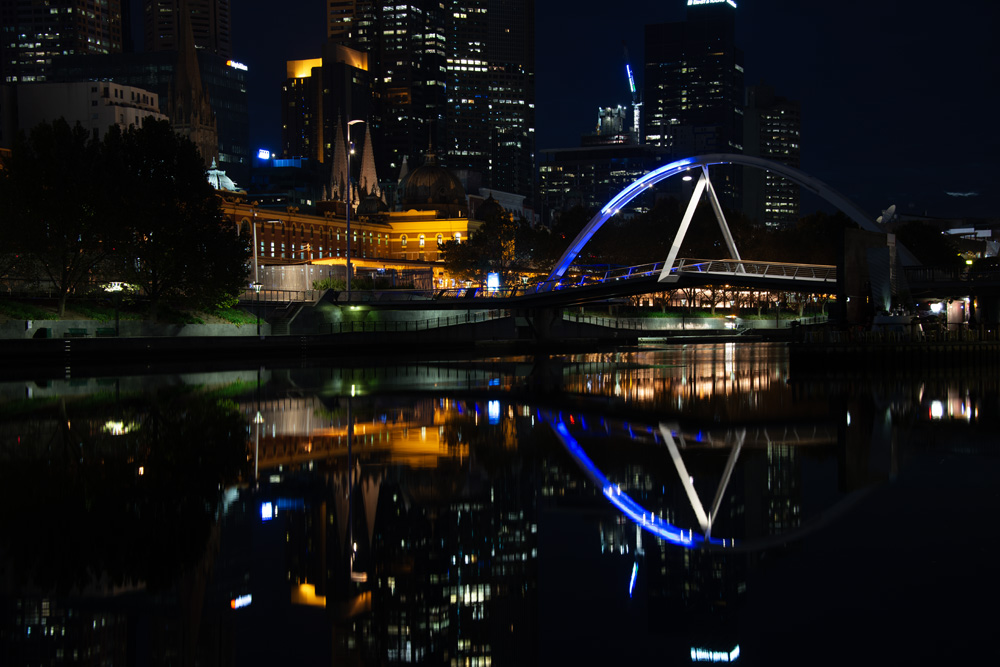
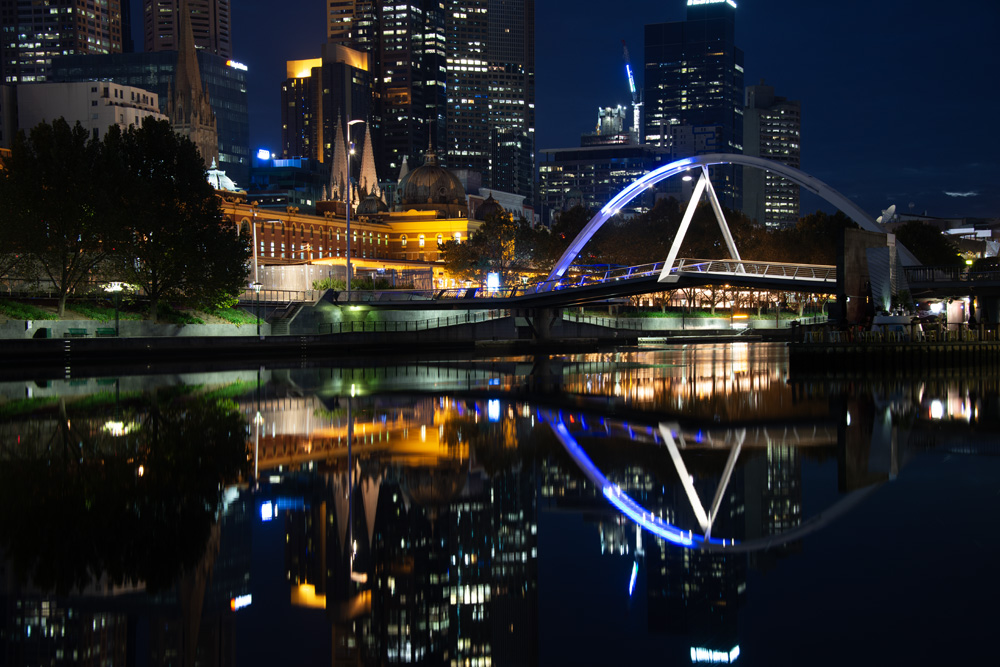
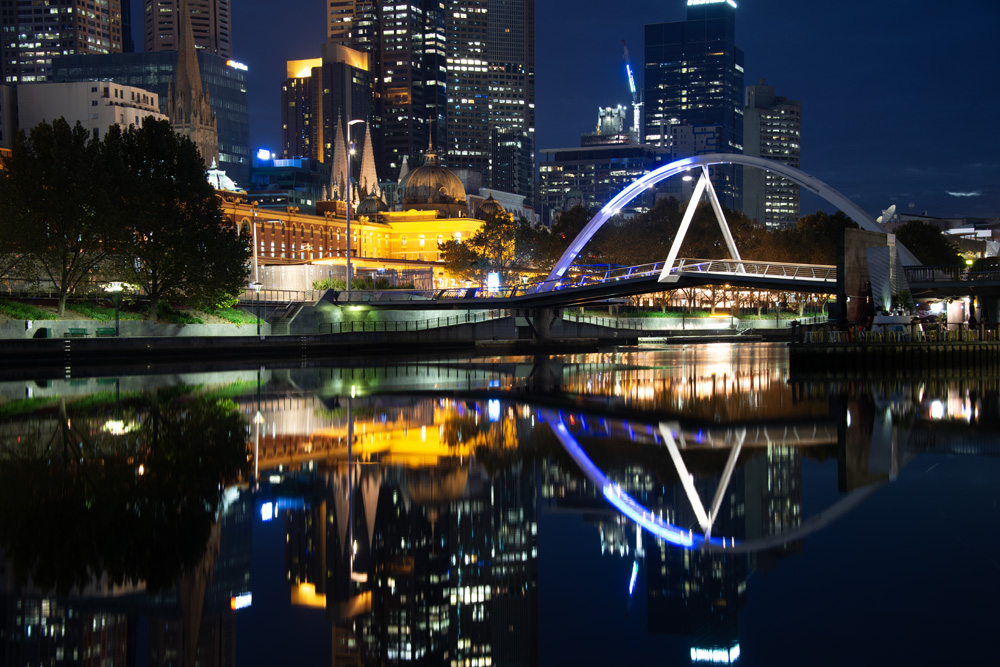
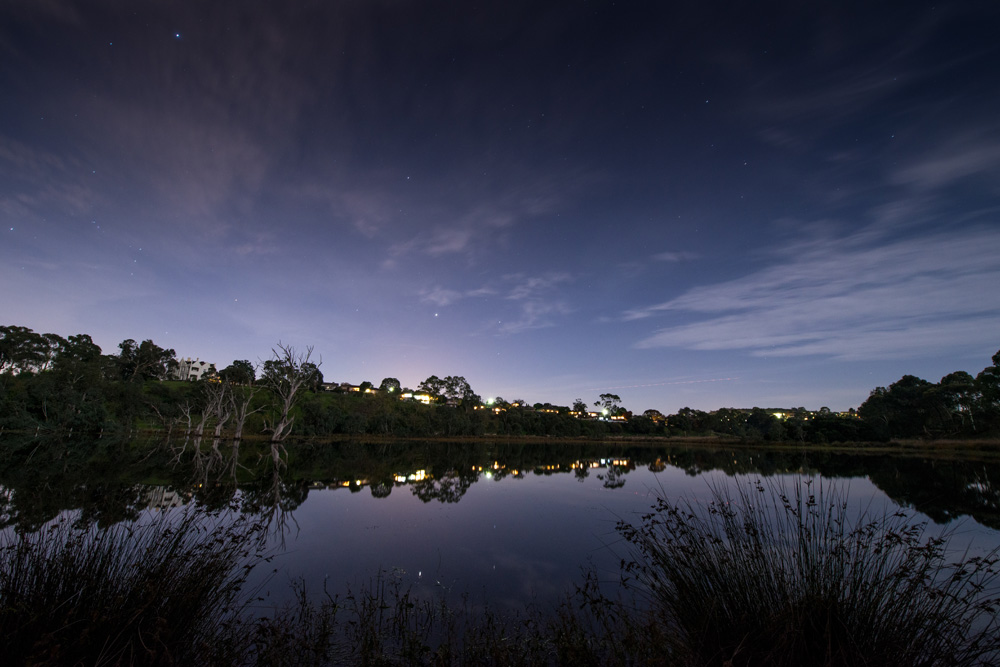
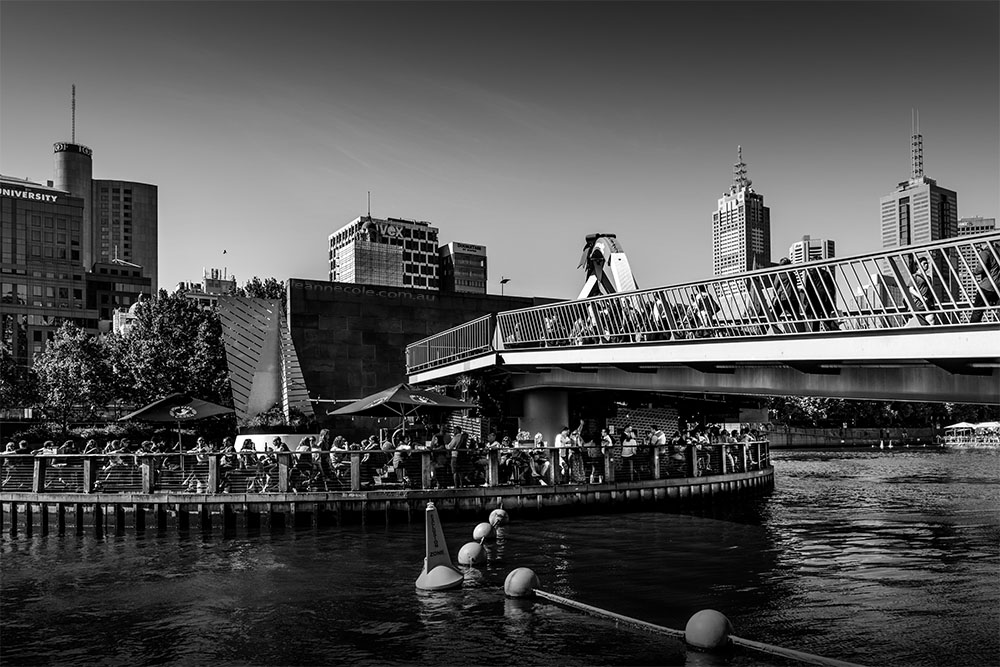
For example look at this image that was taken at 120 seconds, or two minutes.

You can see how the lights are reflected in the river there. The extra time really brings out the lights and colours.
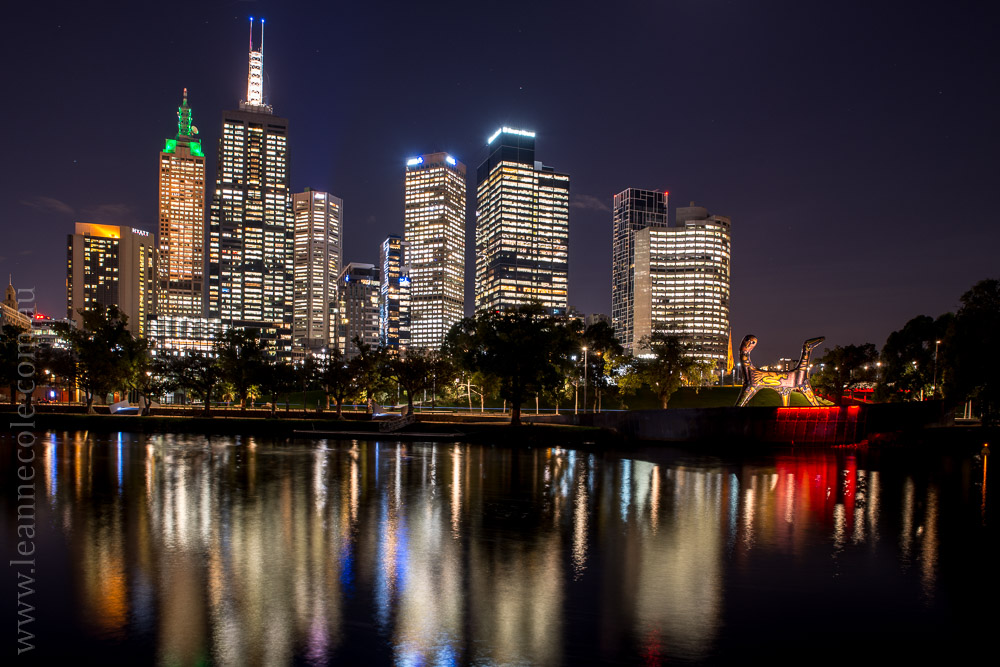
This following image, another from New York, was also two minutes.
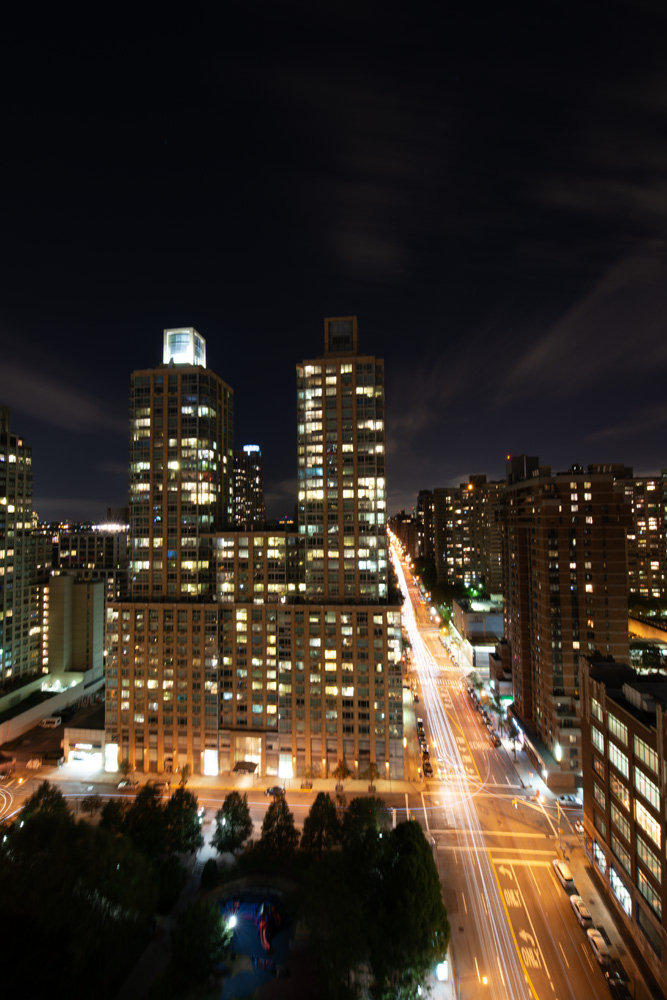
Looking at this now I think I should have done three minutes. What do you think?
Photographing night during a full moon
This can be a lot of fun to do and it is surprising how you don’t need a lot of time to do it.
Here is an example taken just down the road from me. It is a 30 second exposure.
I find it amazing that you can almost see everything that is there. The full moon throws so much light on the landscape that you can get some amazing images.
I thought this next one was taken on a full moon, but it must have been about a week before, however, you can still see that you get a lot of detail with 30 seconds.
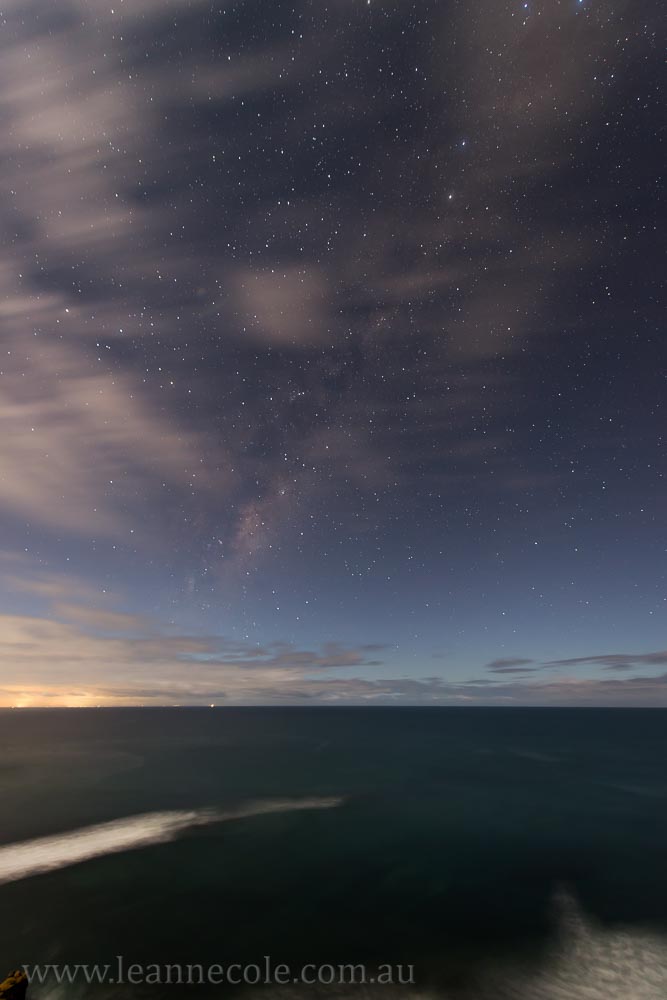
This was taken at Bell’s Beach and I think we were trying for the milky way but there was too much moon for it. The sky isn’t dark enough for it to have been a new moon which is the perfect time for milky way images.
Again you need to experiment and see what you can get. Try different times and see which ones you like when you get them on your computer.
Conclusion
I can’t say it enough that you have to experiment with your times. You need to know how to use your camera and know how to get the longer exposures. If you don’t know how to get to bulb, then Google it because once you know how it isn’t hard to do the rest.
I look forward to hearing about your experiments and how you go. If you have any questions by all means leave them below in the comment section.
I hope this makes night photography easier to understand, but really the best advice I can give is that it is the same as day time photography, just takes longer. Experiment, experiment, experiment. Make sure you stay safe as well.
As promised here is the gallery, I will put the exposure times with each image and will add a couple of extras as well.


Nice presentation, beautiful photos! Now I just have to get a decent camera! Best wishes!
Thank you Phil, all the photos in these posts have been taken with my phone. I will show images from my camera when I get back.
Looking forward to seeing them! Those were amazing photos from a phone!
Thank you Phil. I am excited about getting home and working on them.
Thanks. That’s something I didn’t think to do.
Glad to have helped. Thank you.
Dear Leanne
great pictures, we are impressed.
We live in a dark sky area with low light pollution therefore night photography is not interesting for us. It’s a good place for astro photography but that’s a field we are not interested in.
Nevertheless thanks a lot for your introduction into night photography.
Keep well
The Fab For of Cley
🙂 🙂 🙂 🙂
That is a shame you don’t like night photography. I love it, so I love opportunities to go out and see what I can do.
Astro especially. thank you.
This would be the right place for you here. As we have really dark skies , we are visited by many groups of astro photographers.
I’m sure it would be great, though Australia is perfect for the milky way and there are so many places to capture it. We don’t have to go far from the city to do it.
Leanne, thank you for much for these tips!! I feel like I can do it with my DSLR…I’m gonna have to learn how to do the aperture. I usually use my camera phone for everything, but I recently got out my DSLR to experiment. Appreciate you posting several comparison pics.
You can definitely do it with your DSLR, that is what I used. I will be doing more posts like this, hopefully. I’m glad it helped.
Just a quick thing about aperture. Aperture is all about what is in focus. So the smaller the number the less is in focus. Try taking some phtoos of the same thing, change the aperture for each image and then see how much the focus changes in each image.
wow, what a difference. I especially love the New York shots, when you got to the 3 minutes level
Thank you Beth, I love that shot love the way the extra time really shows the clouds.
Superb photos, Leanne! I looked for the EXIF, but I couldn’t find. I was particularly interested what aperture you were using for most photos — or just one example.
Thank you Egidio, I never give that info, I just don’t think it means anything. I mean that is me. I ususally use f/8 to f/14 most times. ISO would be the lowest I can go for images like this. I hope that helps.
Thank you for these helpful tips and examples!
You’re welcome, I hope they will be useful Karen, thank you.
Thanks for the tutorial Leanne!
You’re welcome Anne, you probably knew all that already. Thank you.
Very beautiful photos, Leanne, wow!! You are amazing. 😊
I always feel weird when people say that, I don’t feel amazing, more that I have tried lots of things and this is what I’ve learned so far. However, thank you for thinking so. 😀
This was great, Leanne. Amazing how much impact a small increment of time can make. Thank you!
It is really surprising, makes so much difference. Thank you Lois.
You are really quite good at this. Thanks for the tips.
Hope the tips help Dawn, thank you.